Building a DIY truck camper can save money, but one bad weight calculation can undo weeks of work. I know how easy it is to focus on cutting lumber before checking what your truck can safely carry.
A home-built camper needs more than basic carpentry. You need to understand payload limits, plan the layout, seal every weak point, and build each stage in the right order. Careful planning makes those decisions much easier.
This project covers the base, wall framing, roof, windows, interior wiring, insulation, and tie-downs. You can use these steps to plan the build in the right order, avoid preventable rework, and keep weight and weather protection in mind.
| Cost Note: Figures in this guide are estimates based on typical material and component costs. Actual totals vary by region, truck size, and how much of the electrical and interior work you take on yourself. Price out your own materials list before committing to a build budget. |
| Difficulty | 4 out of 5, comfortable with a table saw and basic framing |
| Time | 3 to 5 weekends, longer if you’re new to fiberglass work |
| Cost | $600 to $6,000+, depending on materials and how finished the interior gets |
| Tools Needed | Table saw, miter saw, jigsaw, detail sander, clamps, basic electrical tools |
| Skill Required | Intermediate to experienced DIYer |
What Could Go Wrong First When Building a DIY Truck Camper?
Your truck’s payload rating caps this build, not your bed size. That’s the part people skip, and it’s the one mistake that costs the most time to fix after the fact. Check that number before you measure anything.
Bed dimensions only set your footprint. Payload and GVWR set your real weight ceiling, and framing, siding, water, gear, and passengers all eat into that number faster than most first-time builders expect.
Half-ton trucks hit their payload limits quicker than people think. That’s why a lot of builders end up moving to a three-quarter-ton or one-ton truck partway through planning, once they’ve actually done the math.
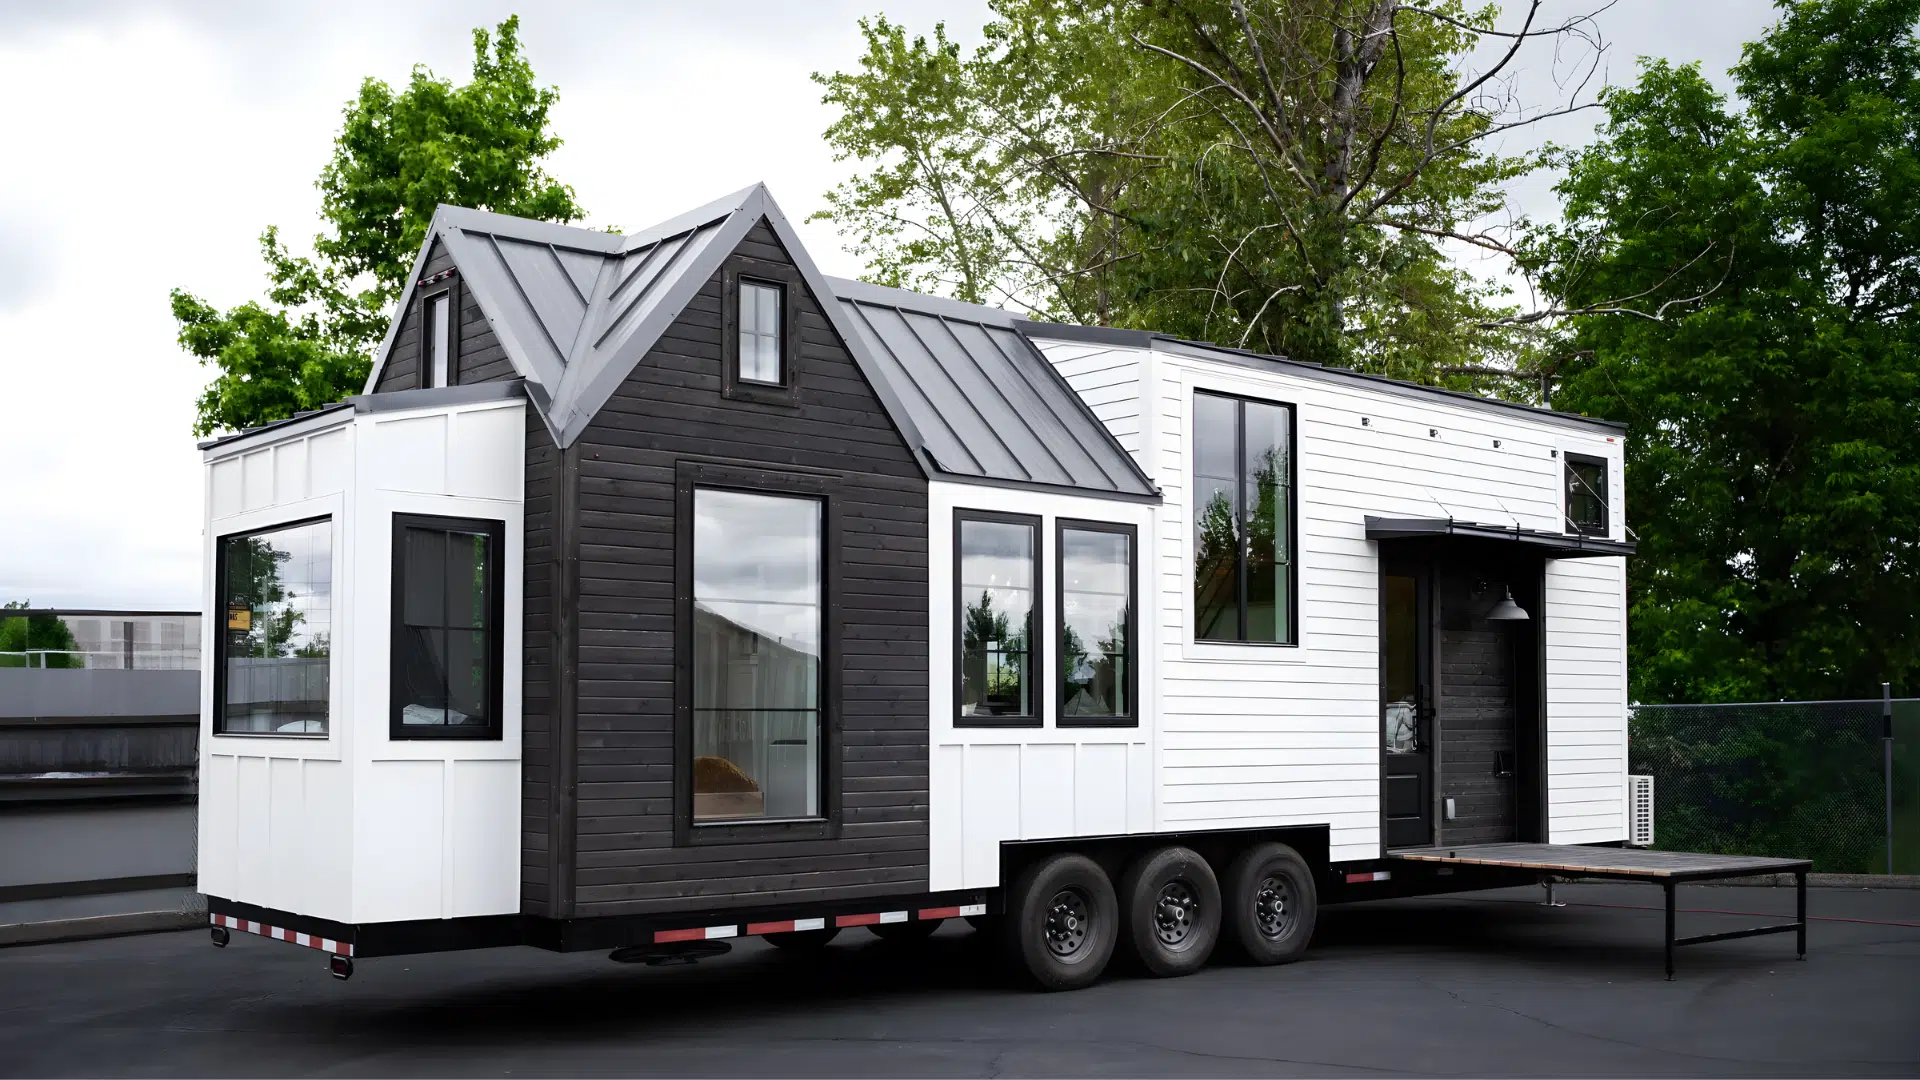
Sketch your interior layout before you frame anything. Decide where you’ll sleep, cook, and store gear first, since that decision shapes every wall and window cutout that follows it. Looking at typical mobile home dimensions can give you a useful size reference, even though a truck bed is a much smaller footprint to work with.
Reworking a wall or a window opening after the frame is built takes far more time than planning it up front, and it’s the second most common regret I hear about after payload surprises.
Tools and Materials for a DIY Truck Camper
Gather everything below before you start cutting. Grouping similar items keeps the list scannable instead of overwhelming.
| Tools | Materials |
|---|---|
| Table saw and miter saw | 1/2-inch and 1/4-inch plywood |
| Jigsaw and metal cutter | 2×2 lumber and 1×6 boards |
| Detail sander and clamps | Wood glue and screws |
| Ruler and paracord | Bed liner and spar varnish |
| Detail tools and sanding supplies | Tongue-and-groove boards and trim screws |
| Cutting tools and measuring tools | Stain-and-poly finish |
| Fastening tools | Fiberglass cloth and resin |
| Workshop supplies | Sliding RV windows and round windows |
| Hand tools | Silicone and pine boards |
| Assembly tools | Hinges, gas struts, and latches |
| Finishing tools | Cedar paneling and rubber flooring |
| Electrical tools | 12-volt lights and wiring supplies |
| Power system tools | Lithium battery and fuse box |
Once you’ve got everything in this list on hand, the actual build moves in six stages. Skip one and the next stage gets noticeably harder, so it’s worth following the order below even when you’re tempted to jump ahead to the fun parts.
If a wet bath is part of your plan, browsing compact RV bathroom layouts from finished units first will save you from framing a space that turns out too tight for the fixtures.
How Do You Build a DIY Truck Camper Step by Step
Building a DIY truck camper starts with planning dimensions, framing the shell, adding insulation, wiring, storage, sleeping space, and weatherproof finishes.
Step 1: Build the Camper Base and Wings
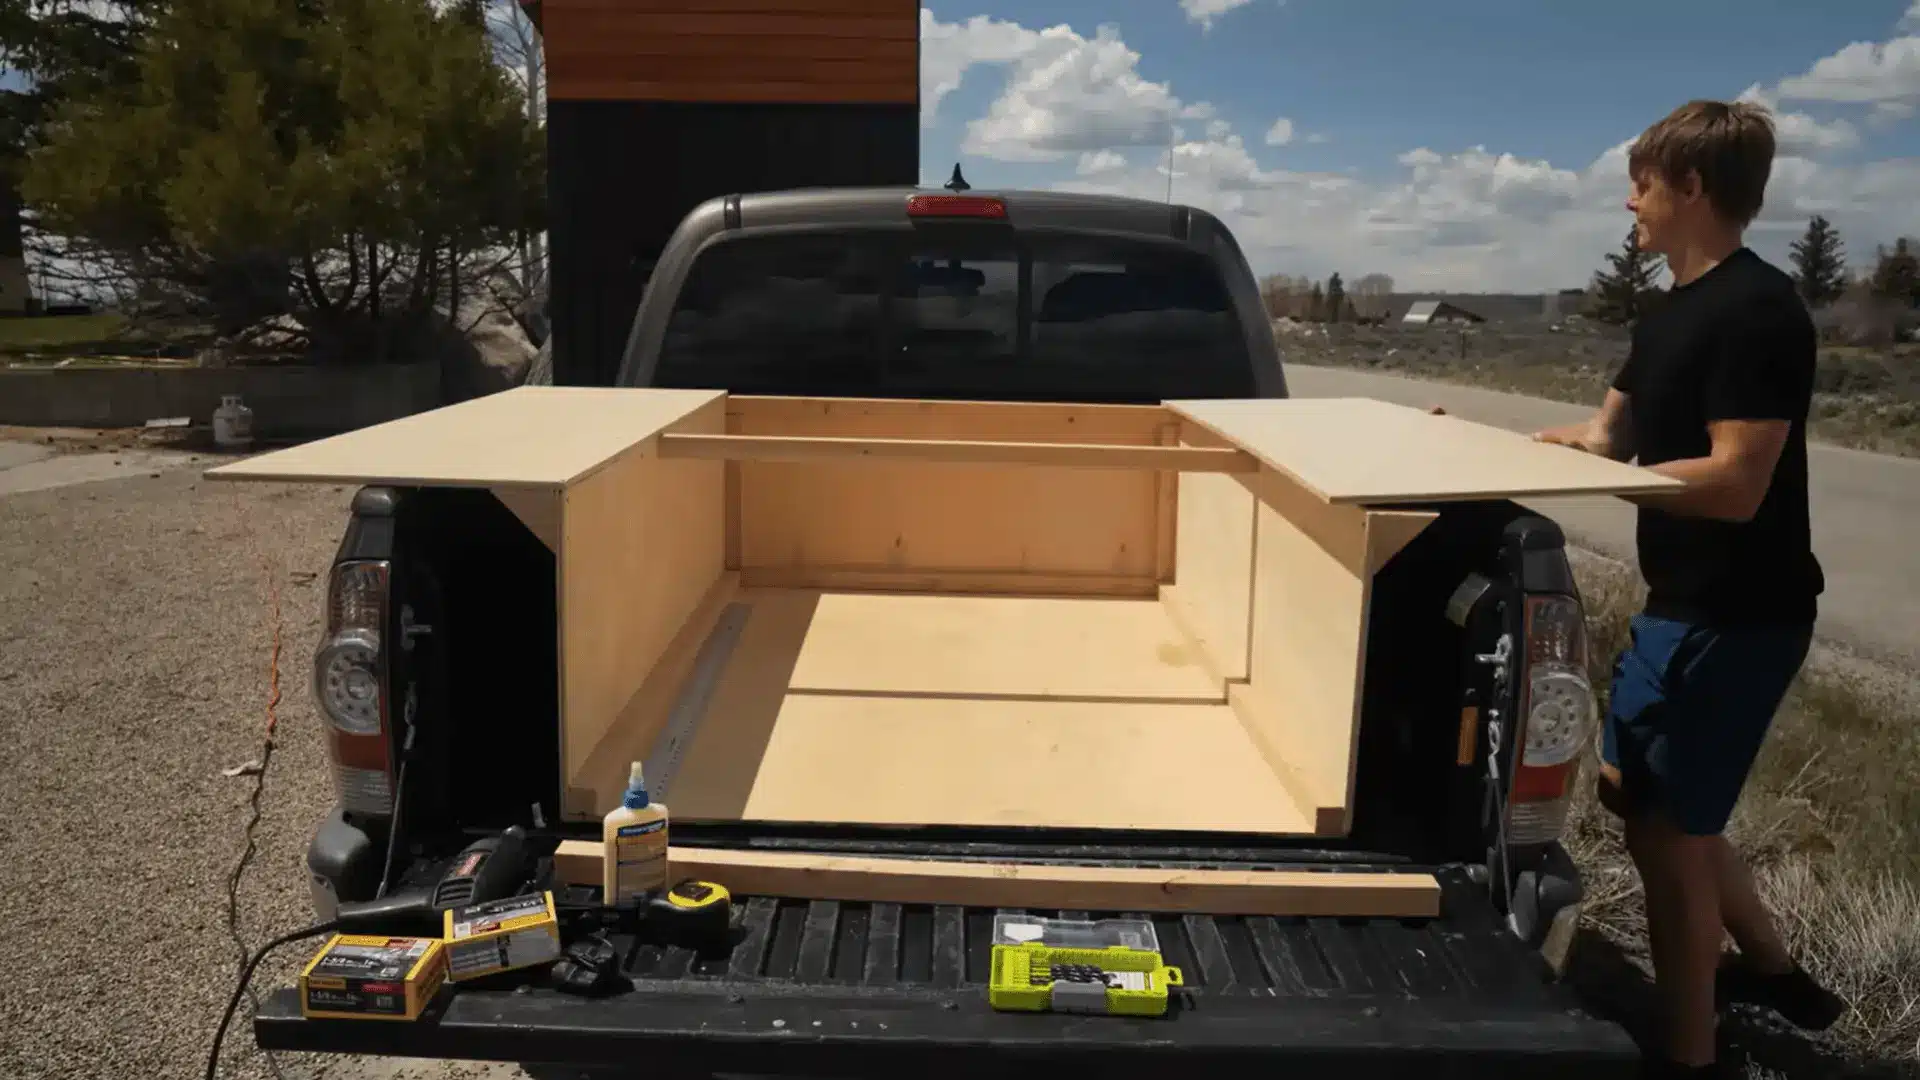
Cut four pieces of plywood to build a box that fits your truck bed. Glue and screw the panels together, then add 2×2 lumber inside for real support, not just something to hang siding from later.
Extend the sides with wings sized for your sleeping area, adding triangular braces underneath. These braces are what let the wings hold actual body weight instead of just looking finished from the outside.
Coat the bottom with bed liner before adding more framing, and hit any exposed wood with spar varnish at this stage. This one step saves you from moisture problems that don’t show up until months later, once they’re much harder to reach.
Step 2: Frame the Walls and Curved Roof
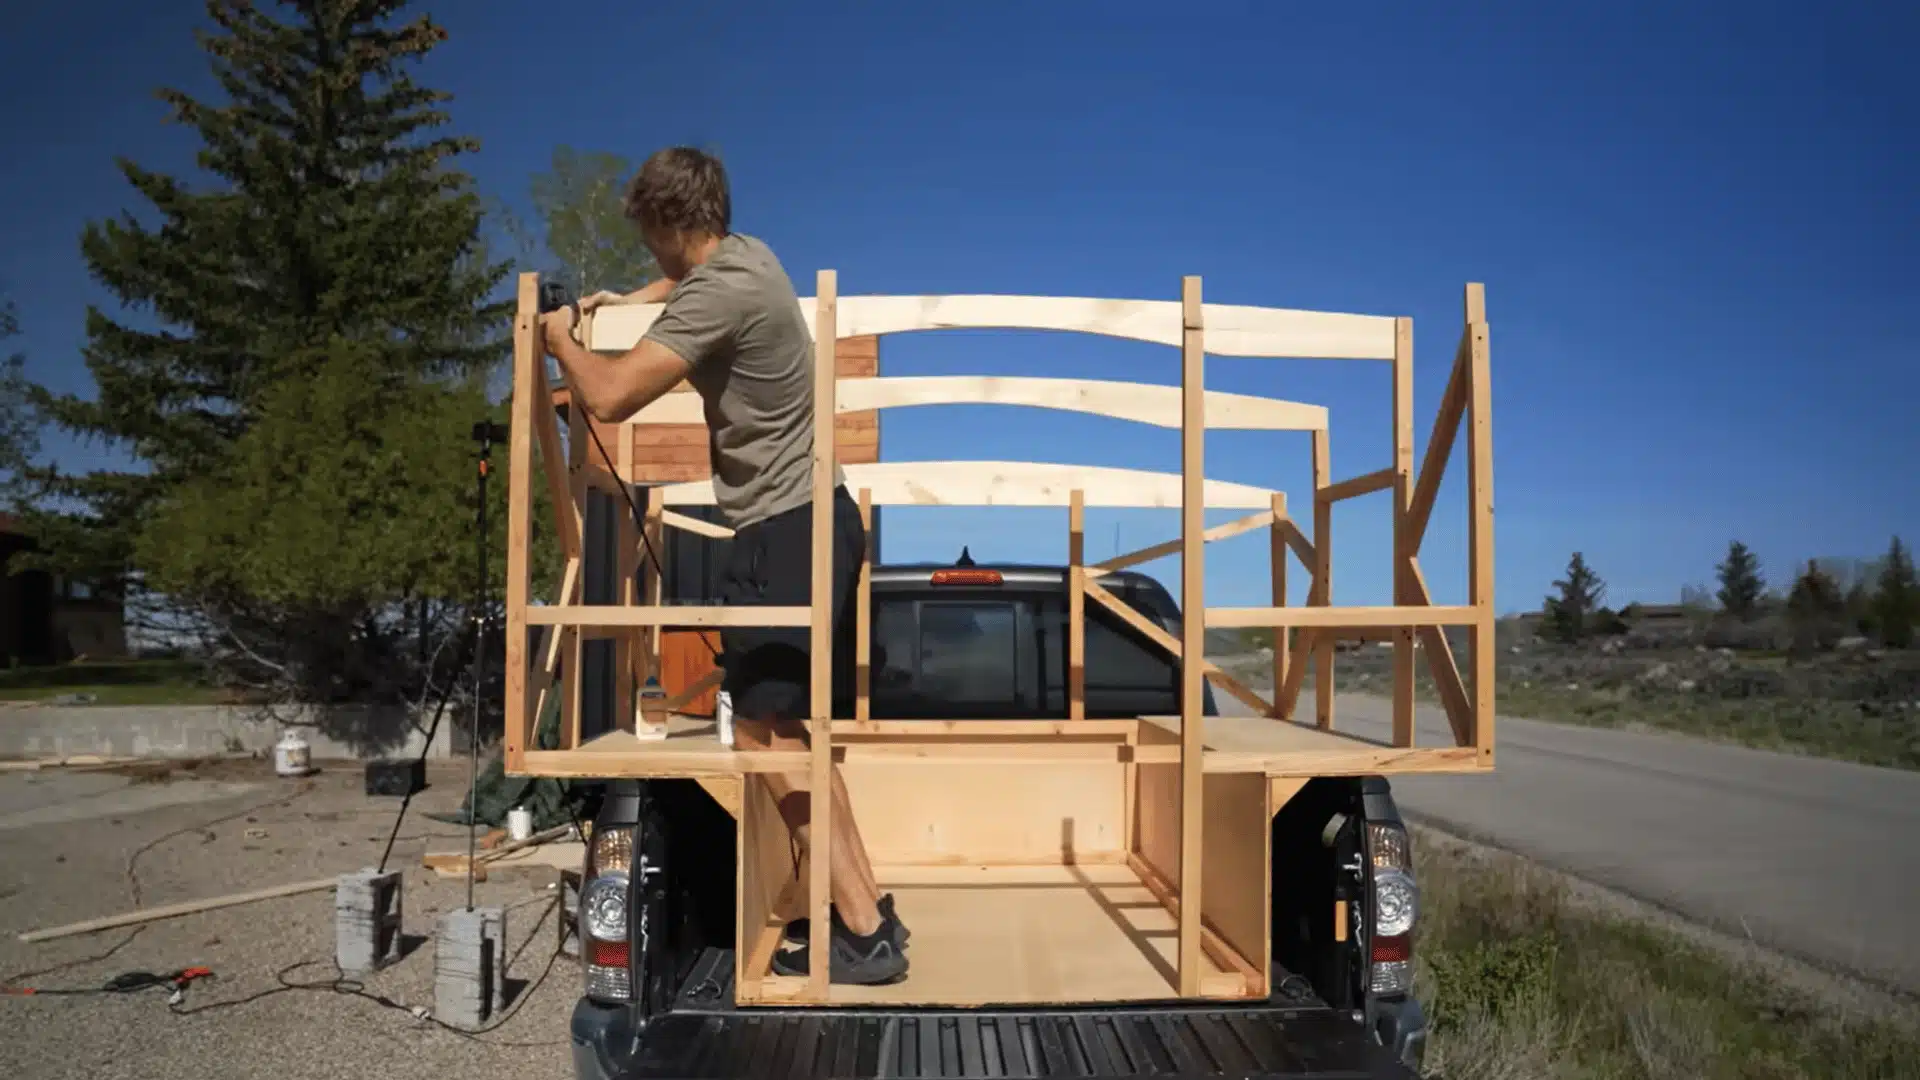
Build the upright frame from 2×2 lumber, leaving openings where your windows and door will go. Brace those openings well, since an unsupported opening flexes over time and that flex is what eventually cracks a seal.
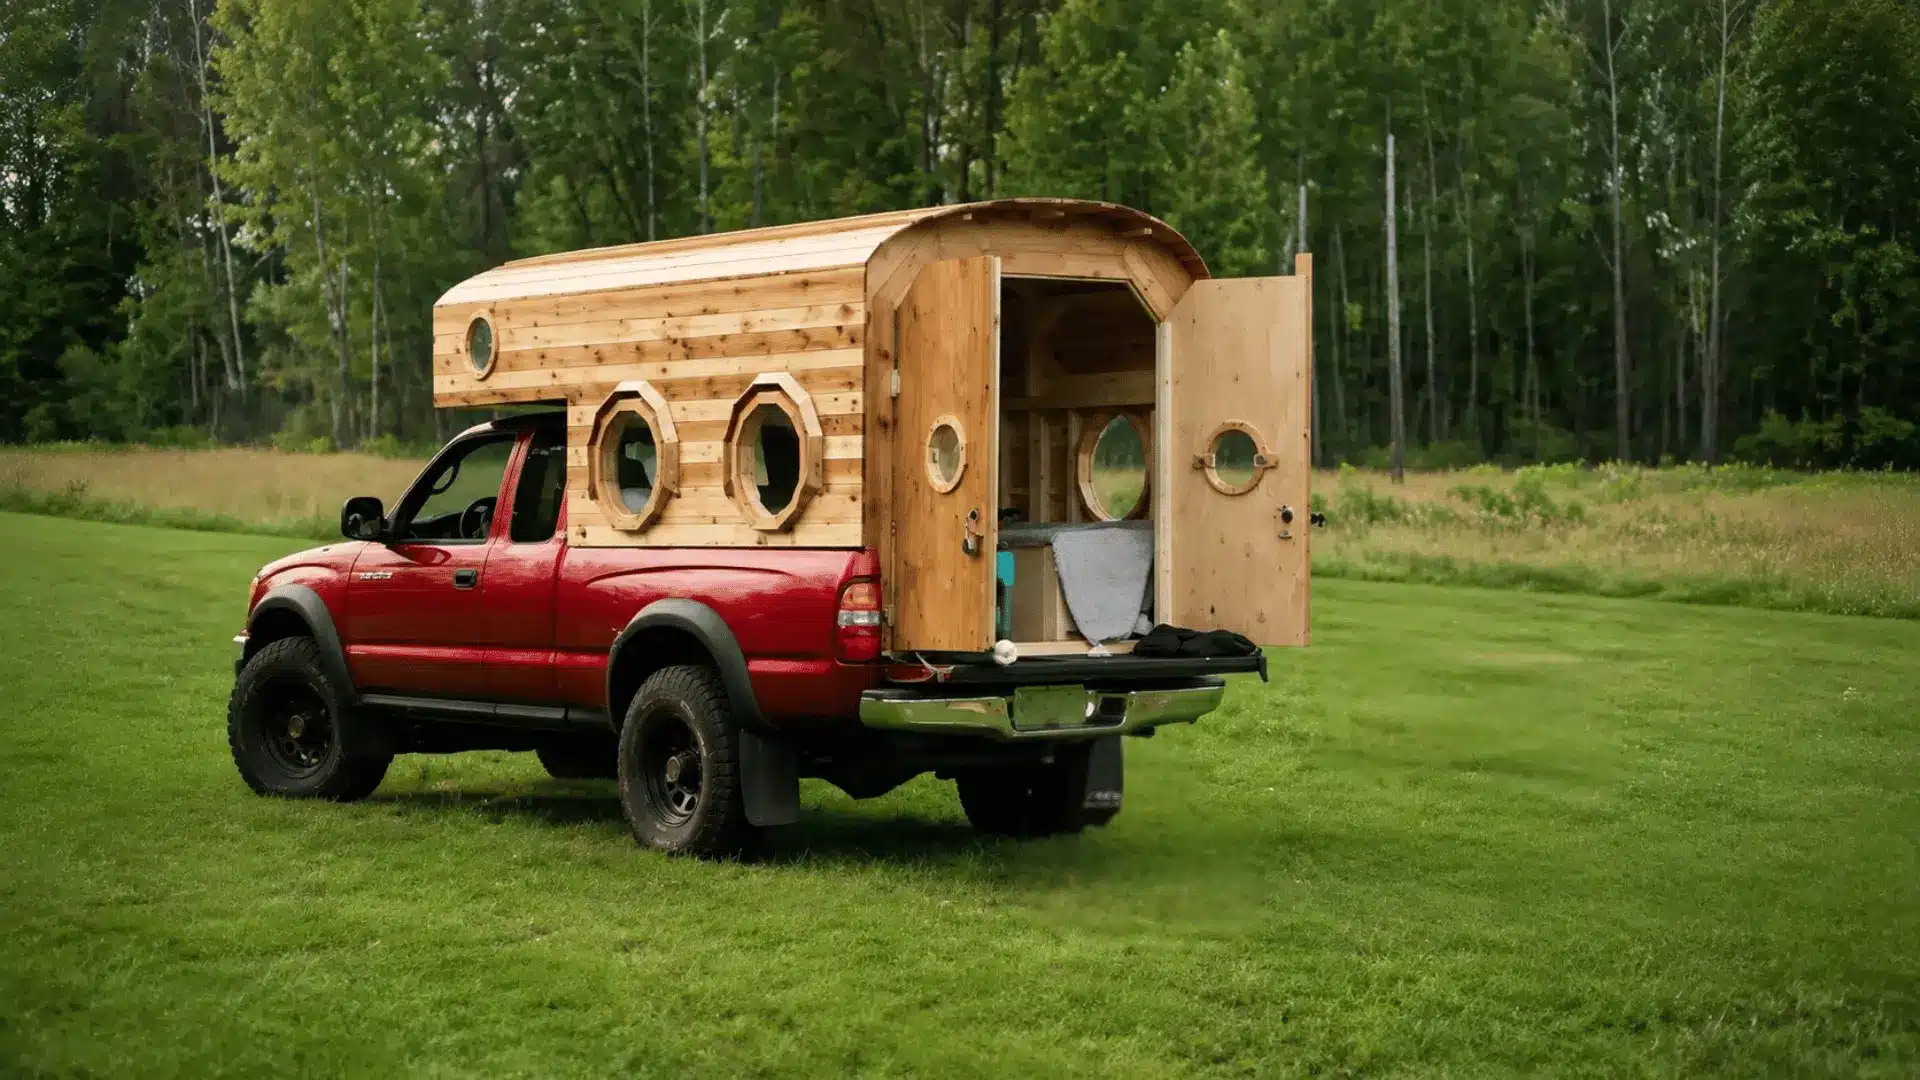
Cut four roof rafters from 1×6 boards, marking the curve before you cut. Sand each curve smooth, then glue and screw the rafters firmly into place before moving on.
Coat the whole frame with spar varnish once it’s fully assembled. This protects the wood underneath before it disappears behind siding for good.
Step 3: Fit and Finish the Exterior Siding
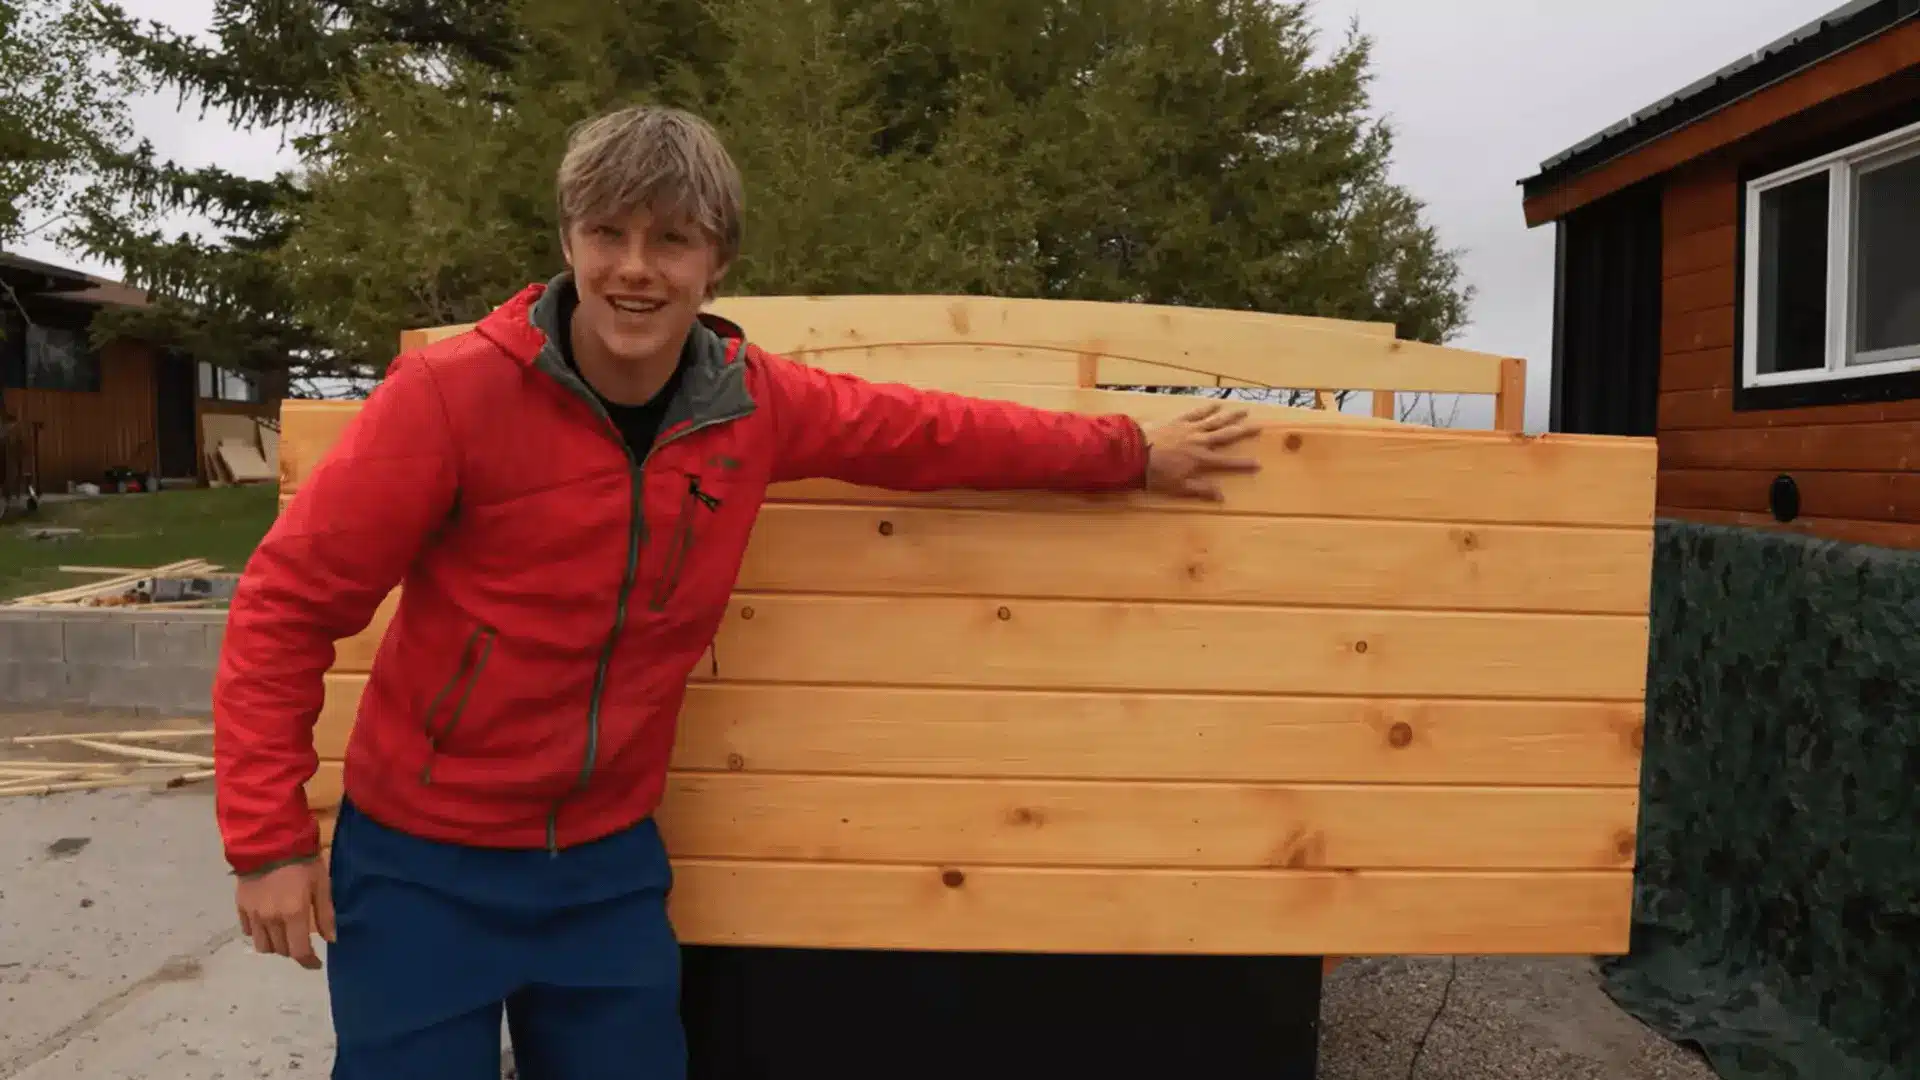
Measure and cut your tongue-and-groove siding one wall at a time. Test-fit each piece against the frame before you commit to attaching it, since siding is a lot more forgiving to adjust while it’s still loose.
Apply an even coat of stain-and-poly finish while the boards are still off the frame. It’s genuinely easier to coat them flat on sawhorses than to coat them once they’re screwed on and you’re working overhead. If a screw hole or a seam gap shows up during test-fitting, a quick pass with wood filler on unfinished boards before staining saves you from a visible patch later.
Once dry, fasten the boards to the frame using exterior trim screws. Cut curved pieces carefully around the roofline, notching only where the roof structure actually requires it.
Step 4: Install and Fiberglass the Roof
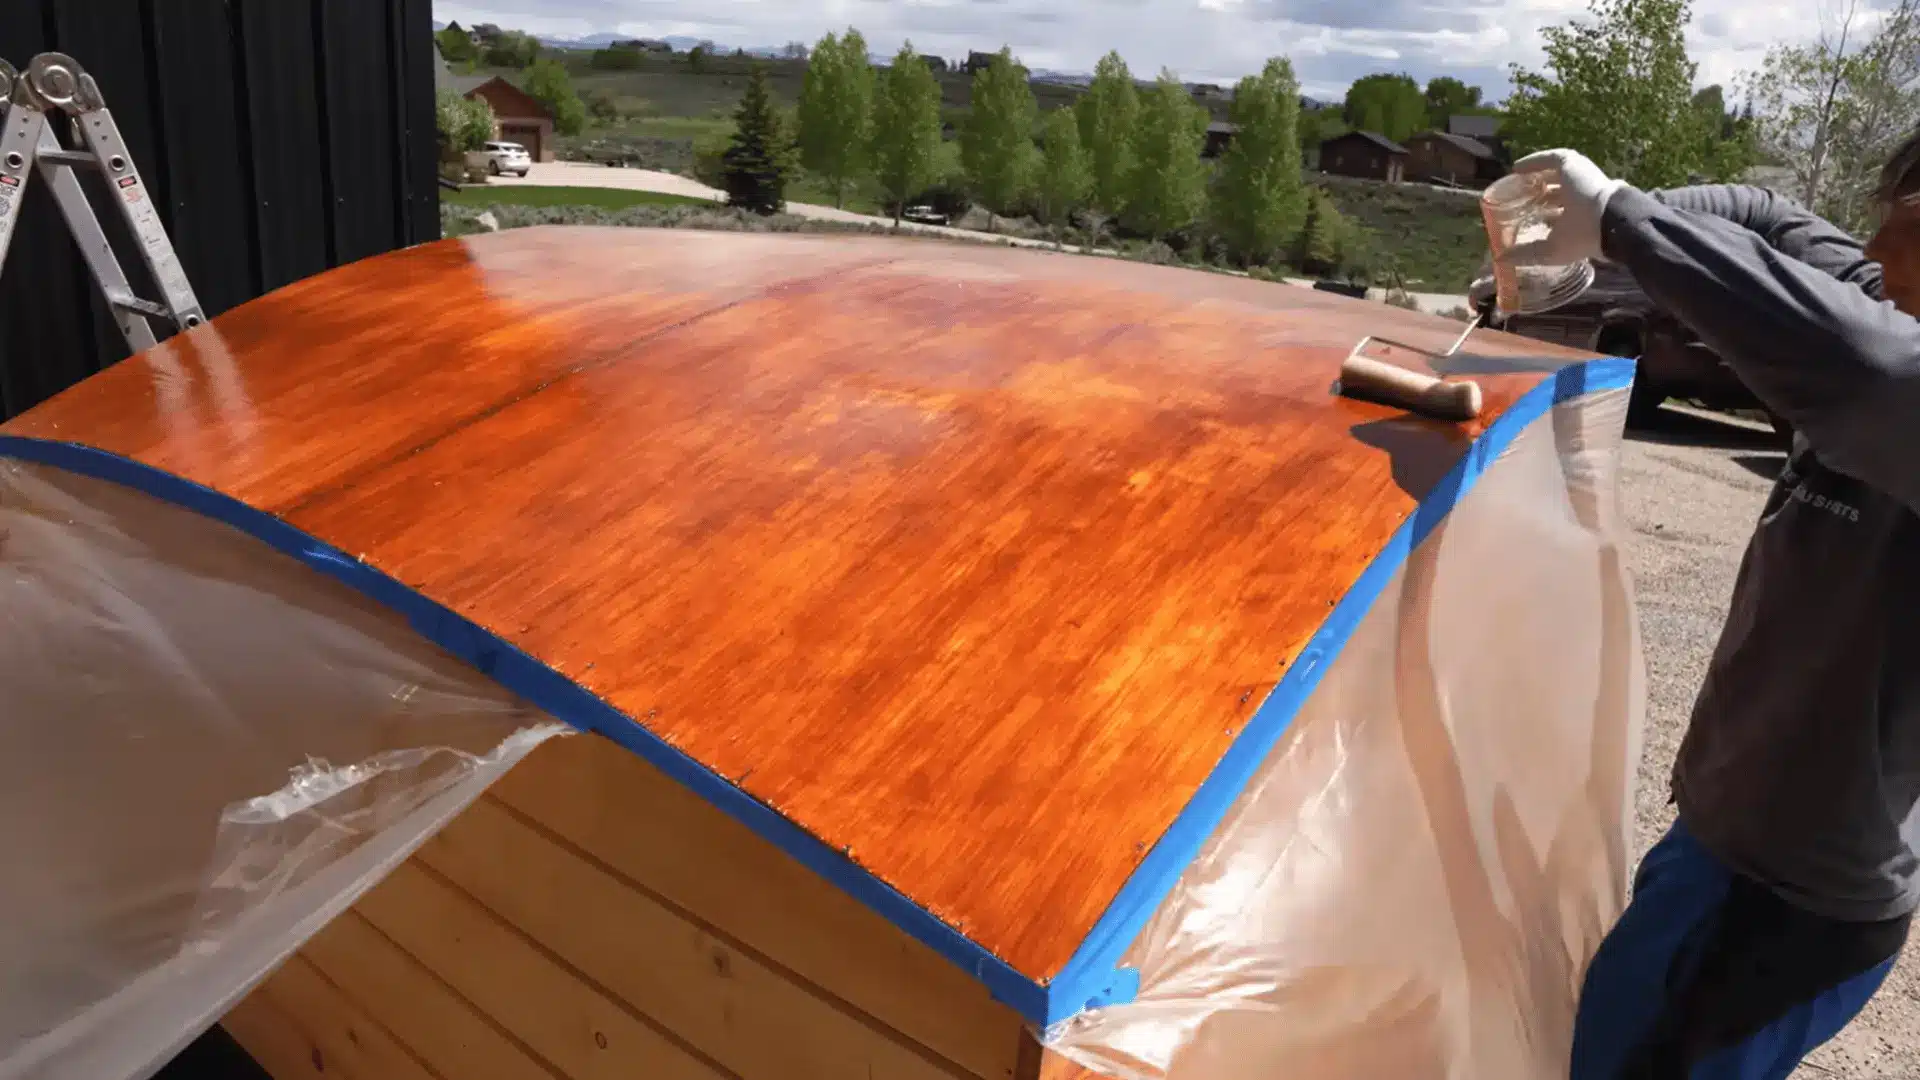
Cut 1/4-inch plywood roughly to your roof shape, then clamp it down over wood glue. Screw it to the rafters and trim the excess with a jigsaw.
Sand the edges smooth before staining. A rushed sanding job here telegraphs straight through the fiberglass once it’s applied, so give this part the time it needs.
Cover the roof with fiberglass cloth and saturate it fully with resin. Add several coats, sanding between each one, until the surface feels smooth and sealed all the way across.
| Safety Note: Fiberglass resin gives off strong fumes. Work outdoors or in a space with real cross-ventilation, and wear gloves and a respirator rated for organic vapors, not just a dust mask. |
Step 5: Install the Windows, Doors, and Exterior Trim
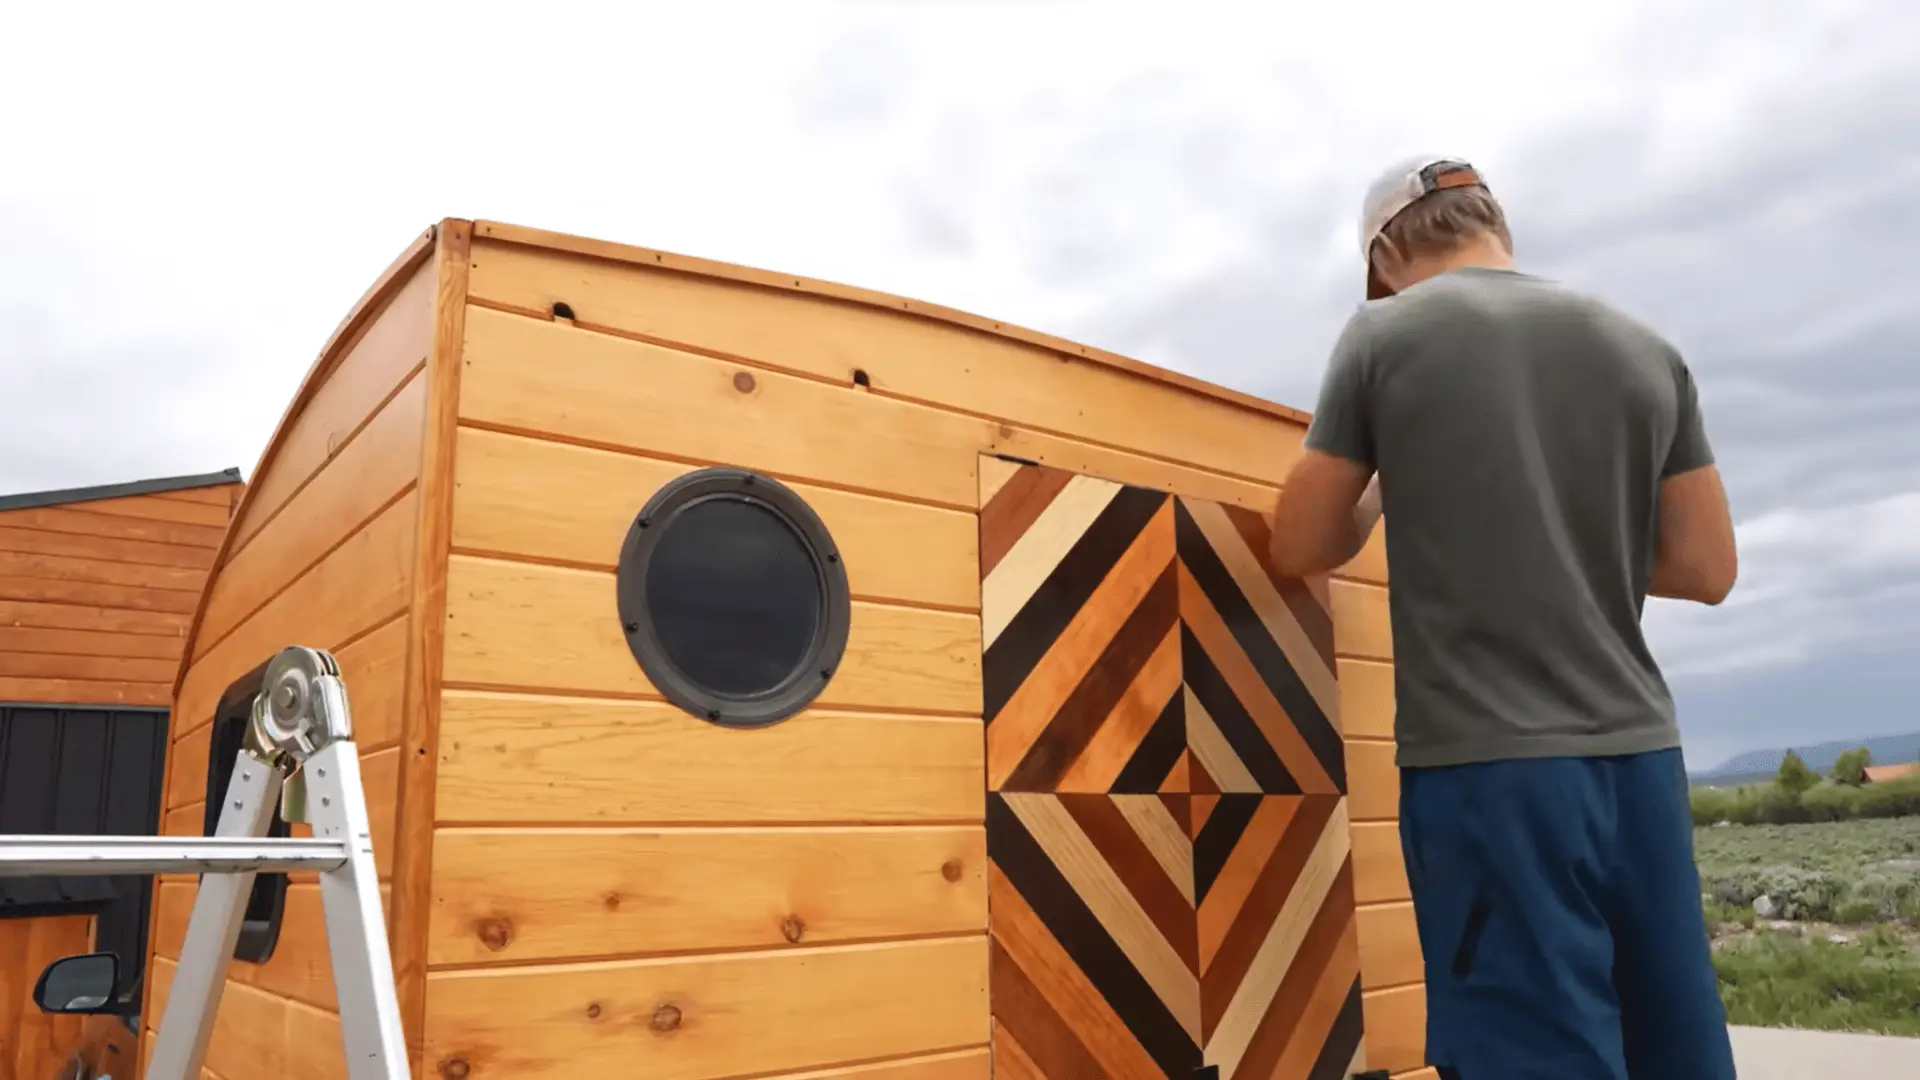
Trace your windows onto the siding and cut the openings with a jigsaw. Run a bead of silicone around each opening before setting the windows into place.
This silicone step matters more than it looks like it should. Skipping it is one of the fastest ways to end up with a leak once you’re two hundred miles from home.
Build your door from plywood and angled pine pieces, then stain and seal both sides. Add hinges, gas struts, latches, handles, and trim to close out the shell.
Step 6: Finish the Interior and Electrical System
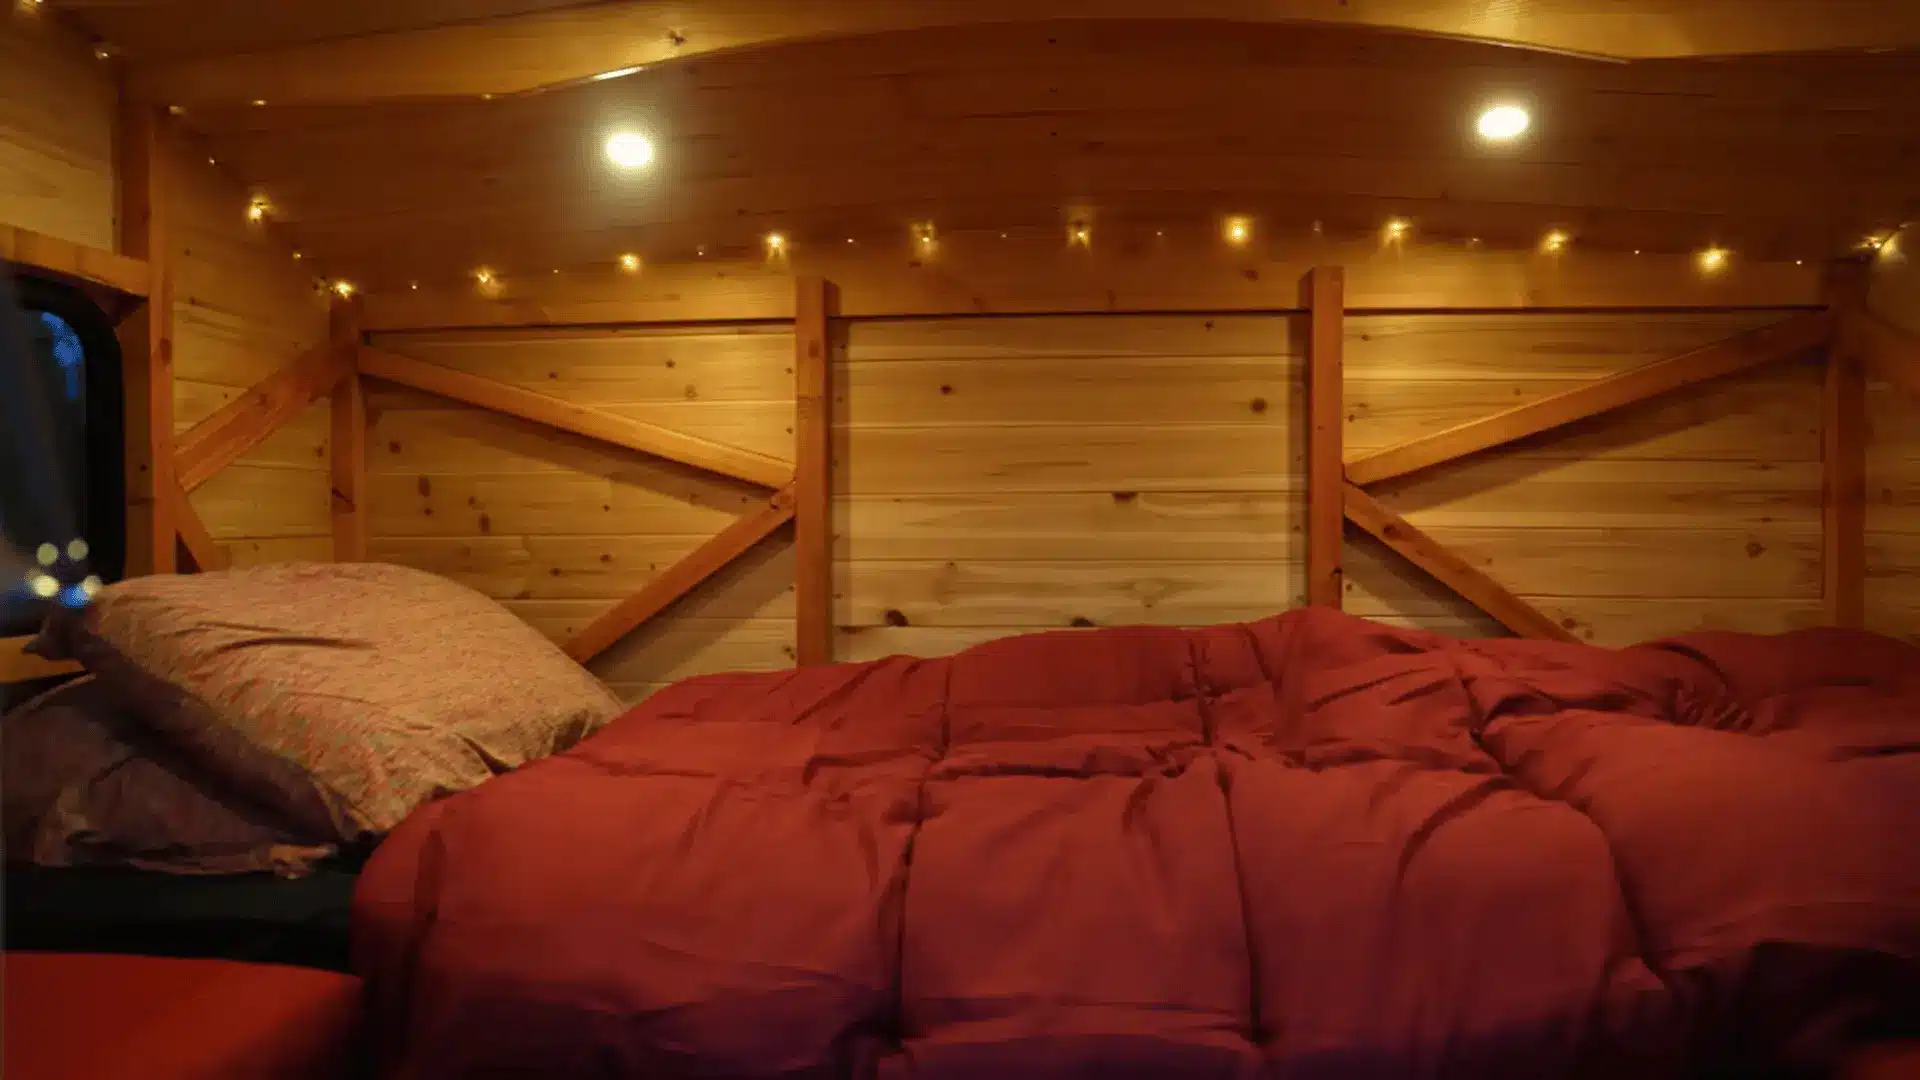
Cut cedar paneling for the ceiling and walls, fitting each piece around your existing framing. Run wiring for the puck lights before you close up the ceiling, not after.
Wiring after the ceiling’s closed means cutting into finished panels later just to fish a wire through. Doing it now saves you that entire headache.
Secure the cedar paneling with interior trim screws once your wiring is fully run. Then connect the charger, battery, fuse box, lights, and outlets to bring power online.
For the full build walked through on video:
| Pro Tip: If I were doing this build again, I’d stain and seal every board before it goes anywhere near the frame, not just the siding. Coating flat pieces on sawhorses takes a fraction of the time it takes to coat the same wood once it’s assembled, and I learned that the hard way on the roof deck. |
Once the shell and interior are buttoned up, the material you built it from and how well you sealed it are what determine whether this camper lasts two seasons or twelve.
Which Material Should You Build Your Camper Frame From?
Your material choice affects cost, weight, required tools, and protection against moisture. These same factors also matter when planning a DIY pop up camper, where keeping the structure light can be especially important.
| Material | Cost | Tools required | Water resistance | Best for |
|---|---|---|---|---|
| Wood | Cheapest option | Basic tools like a table saw and drill | Absorbs moisture, needs sealing and upkeep | First-time builders on a budget |
| Aluminum | Higher upfront cost | Welding or specialized fasteners | Resists rot completely | Wet or humid climates, long-term use |
| Composite panels | Highest cost, but pre-engineered | Less cutting and fabrication overall | Fewer seams, strong weatherproofing | Builders who want speed and durability |
Wood gets you started fast and cheap, but it demands ongoing maintenance to stay ahead of rot. If you’re comfortable checking seals every season, it’s still the right call for a first build.
Aluminum asks more of you upfront, in both cost and welding skill. In return, you get a frame that won’t rot, which matters if you’re camping somewhere damp for most of the year.
Composite kits cut down on fabrication work, giving you fewer seams and better weather protection out of the box. They’re worth pricing out if speed matters more to you than the satisfaction of cutting every piece yourself.
How Do You Insulate and Waterproof a DIY Truck Camper?
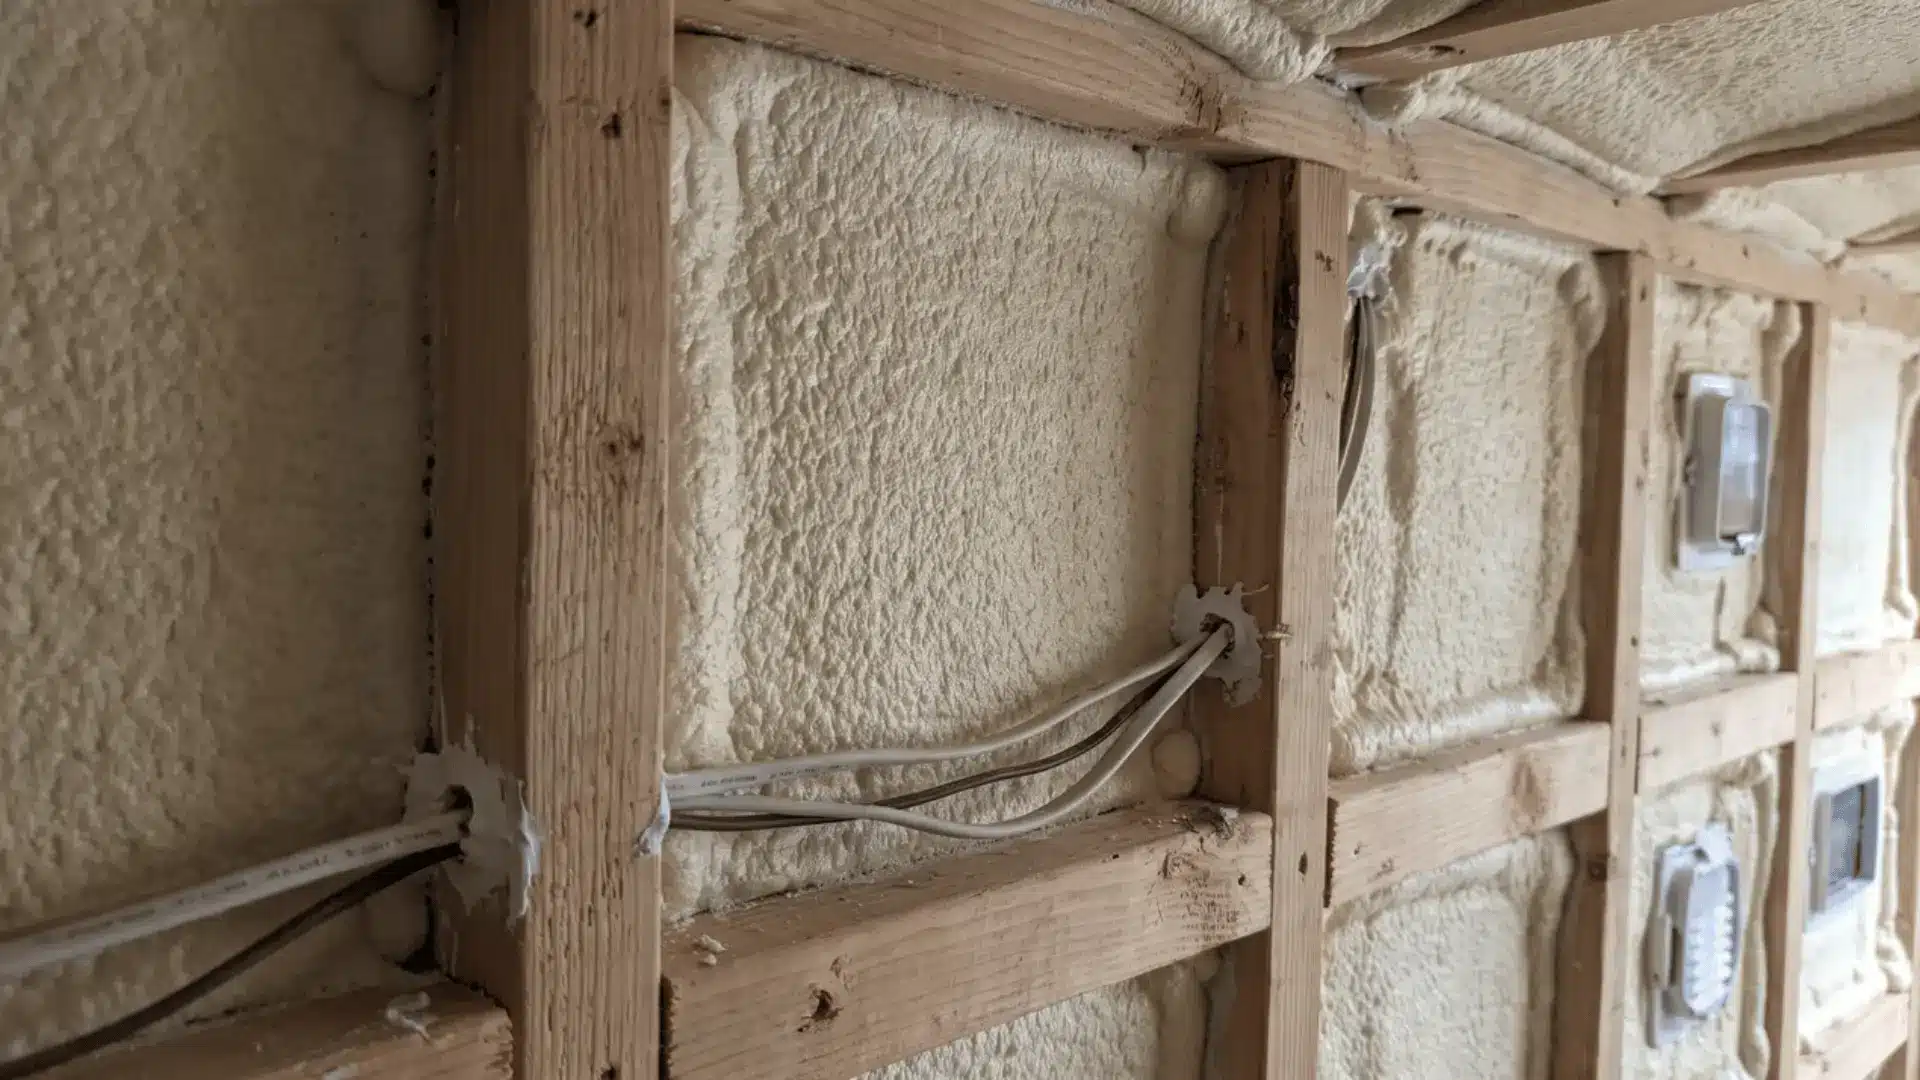
Insulation and sealing work together to keep your camper dry and comfortable for years, not just for the first camping season you take it out.
Closed-cell foam is the better choice for a truck bed environment. It resists moisture far better than fiberglass batt insulation, which soaks up water and stays wet for a long time once it’s compromised.
Water doesn’t usually get in through the walls themselves. It finds its way through specific weak points, so knowing where to focus matters more than which insulation brand you buy.
- Front nose seams: This is the most common entry point, especially at highway speed.
- Vents and wiring penetrations: Any hole through the exterior needs proper sealant, not just a quick bead of caulk.
- Forward-facing windows: Rain hits these directly while driving, so the seals here need extra attention during installation.
Skipping proper sealant here isn’t a shortcut worth taking. Fixing a hidden leak months later costs far more time than sealing it correctly the first time around, and it usually means pulling paneling you just finished installing.
How Do You Secure a DIY Truck Camper to the Truck Bed?
Two things hold your camper in place: tie-downs and turnbuckles. Together, they connect your camper to your truck, and getting this right is what keeps the whole build stable at highway speed.
Tie-downs are the anchor points, and you’ll need four of them, two at the front and two at the rear of the bed. Turnbuckles connect those tie-downs to brackets on the camper’s frame.
You can choose frame-mounted tie-downs, which bolt to the truck’s frame for the strongest connection, or bed-mounted tie-downs, which attach to the bed rails, install more easily, and flex more under load.
Turnbuckle manufacturers commonly recommend around 300 pounds of tension on each of the four points. Too loose and the camper can shift; too tight and you risk stressing the anchor points themselves.
A rubber bed mat underneath adds one more layer of stability. It keeps the camper from sliding around and protects your truck bed from scratches at the same time. Any structural build like this one is worth treating with the same before-you-commit caution as a bigger outdoor project before you hit the road with it.
Summing Up
Building your own camper works best when every decision supports safe weight, weather protection, and a practical layout. I would treat payload limits as the starting point, then choose materials and features that stay within that number.
You also need tight seals around windows, roof sections, vents, and wiring openings, plus secure tie-downs before driving. A DIY truck camper can be a rewarding project when the frame, exterior, insulation, electrical system, and mounting hardware are planned as one complete build.
Before your first long trip, weigh the loaded truck and check the finished camper carefully. If you are planning a build, share your setup ideas or read the related camper guides for more practical help
Frequently Asked Questions
How Much Does It Cost to Build a DIY Truck Camper?
Costs typically run from a few hundred dollars for a basic wood-framed platform to $6,000 or more for a fully insulated, furnished build. Material choice, size, and amenities like electrical or refrigeration drive most of that range.
What Is the Best Material for a DIY Truck Camper Frame?
Wood is the cheapest and easiest option for a first build, but it needs ongoing maintenance to resist rot. Aluminum costs more and requires welding, but resists moisture damage better, making it the stronger long-term choice in wet climates.
How Do You Secure a Truck Camper to the Truck Bed?
Most builds use four tie-down points, two front and two rear, connected to turnbuckles bolted to brackets on the camper frame. Frame-mounted tie-downs offer the strongest connection, and a rubber bed mat helps prevent sliding during transport.
How Do You Know if Your Truck Can Handle a DIY Truck Camper?
Check the Tire and Loading Information label on the driver’s side door edge or doorjamb rather than trusting brochure figures. For an accurate number, weigh your truck empty and then fully loaded with the camper at a certified scale.
How Long Does It Take to Build a DIY Truck Camper?
Most first-time builders finish in 3 to 5 weekends, working evenings and weekends around a day job. Fiberglassing the roof and running electrical are the two stages that most often stretch the timeline longer than expected.
What Insulation Should You Use in a DIY Truck Camper?
Closed-cell foam is the better choice for truck bed builds. It resists moisture far better than fiberglass batt insulation, which soaks up water at the seams and stays wet long after the leak that caused it is fixed.