Building a bunker gives you a secure and controlled space that can be used during emergencies or for long-term preparedness.
When you understand how to build a bunker, you can make informed decisions about structure, materials, and safety features.
A well-planned bunker is not just about construction but also about usability and durability. This helps you avoid costly errors and ensures your setup is practical.
In this blog, you will learn each step in detail, from planning to maintenance. With a structured approach, you can build a bunker that meets your needs and remains effective over time.
Why Do You Need a Bunker?
Understanding why you need a bunker is the first step before starting construction. Your purpose will influence the design, size, and features you include in the structure.
A bunker can serve different needs depending on your situation. It may be used for emergency protection, storage, or long-term shelter during uncertain conditions.
When you clearly define your purpose, it becomes easier to plan a bunker that meets your requirements and avoids unnecessary features.
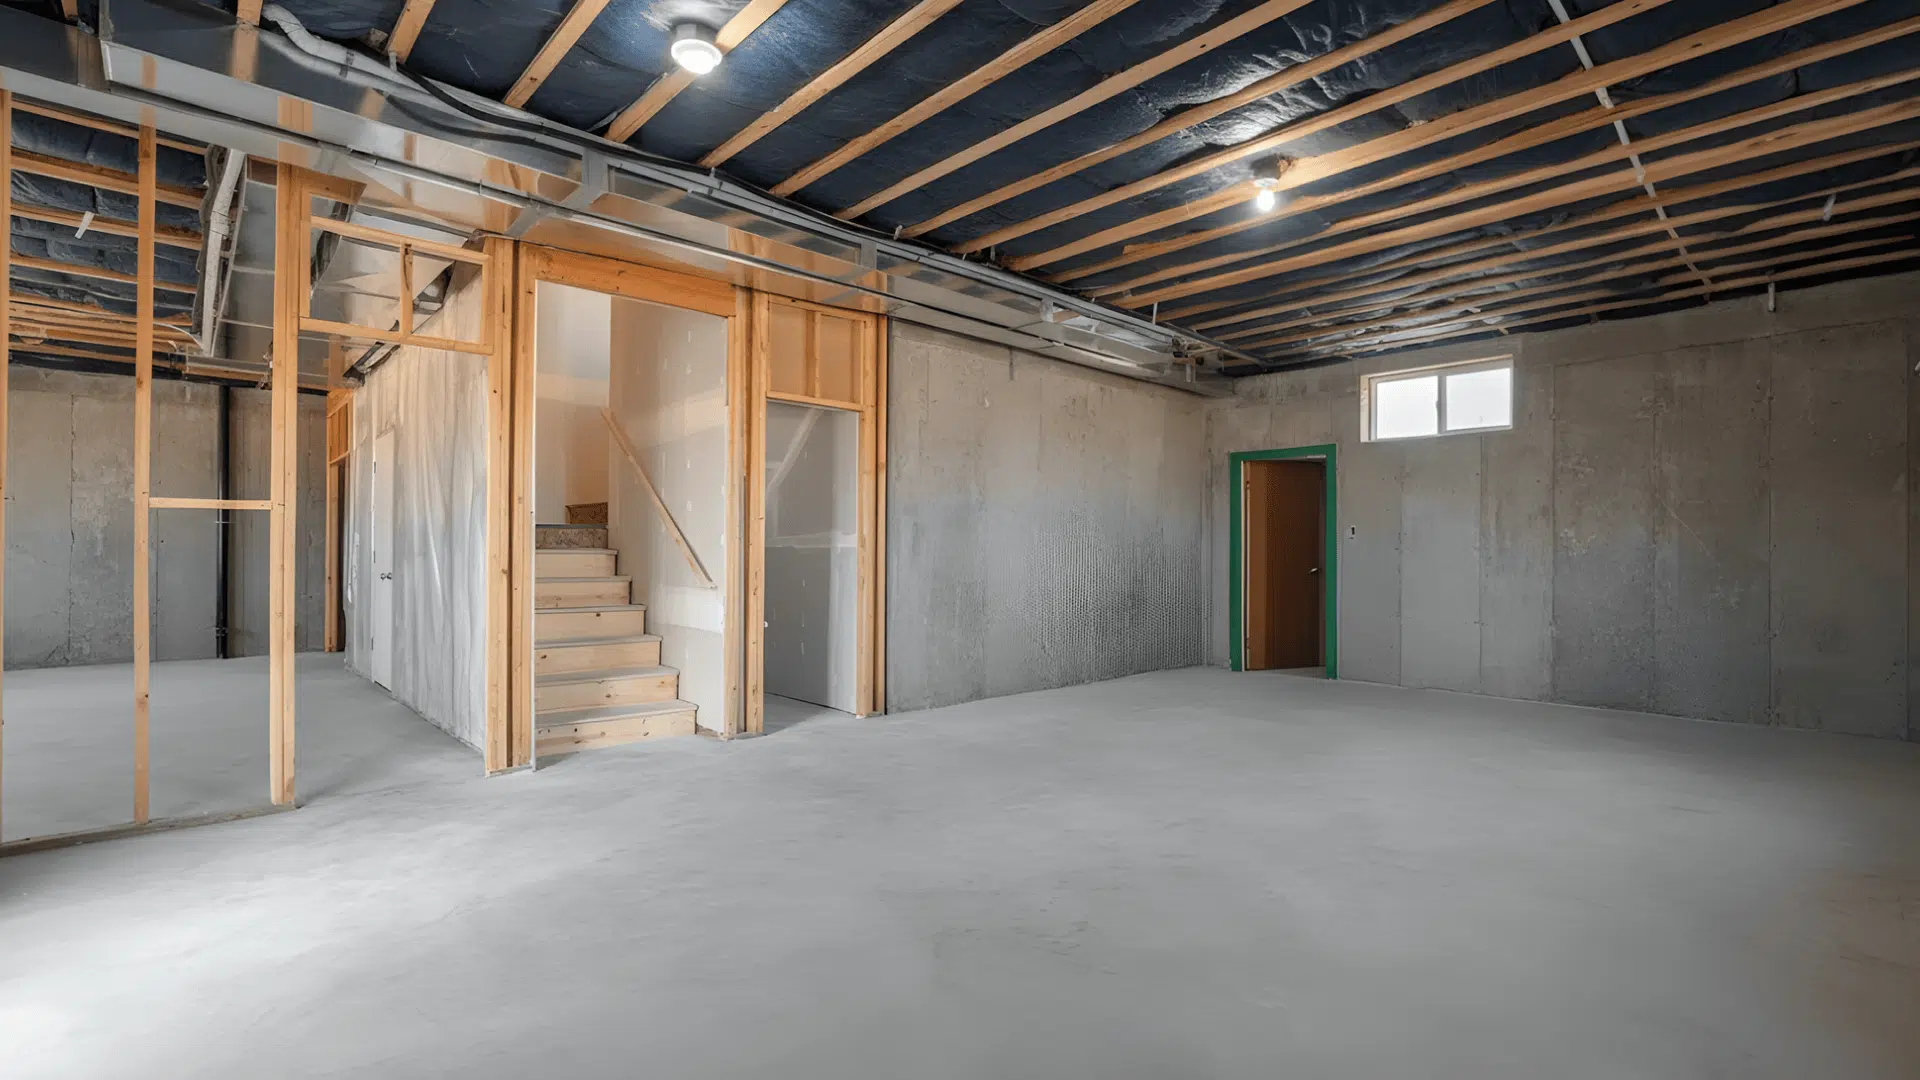
Key Elements of Building a Bunker
- Location selection: Choose stable soil and avoid areas with high groundwater levels
- Structural strength: Use reinforced materials like concrete or a shipping container bunker for durability
- Ventilation system: Ensure proper airflow to maintain breathable conditions
- Waterproofing: Prevent moisture from entering and damaging the structure
- Access points: Plan secure entry and emergency exit routes
Focusing on these elements helps you build a bunker that is safe, functional, and suitable for long-term use.
Types of Bunkers You Can Build
There are different types of bunkers, and each offers unique benefits depending on your requirements. Choosing the right type helps you build efficiently.
| Type | What It Is | What You Need |
|---|---|---|
| Underground Bunker | Built below ground for maximum protection and natural insulation. One of the most secure options for long-term use. | Excavation work, strong structural support, and proper waterproofing |
| Above-Ground Reinforced Bunker | Built on the surface, easier and quicker to construct. Suitable where digging is difficult. | Reinforced concrete and steel, solid design planning |
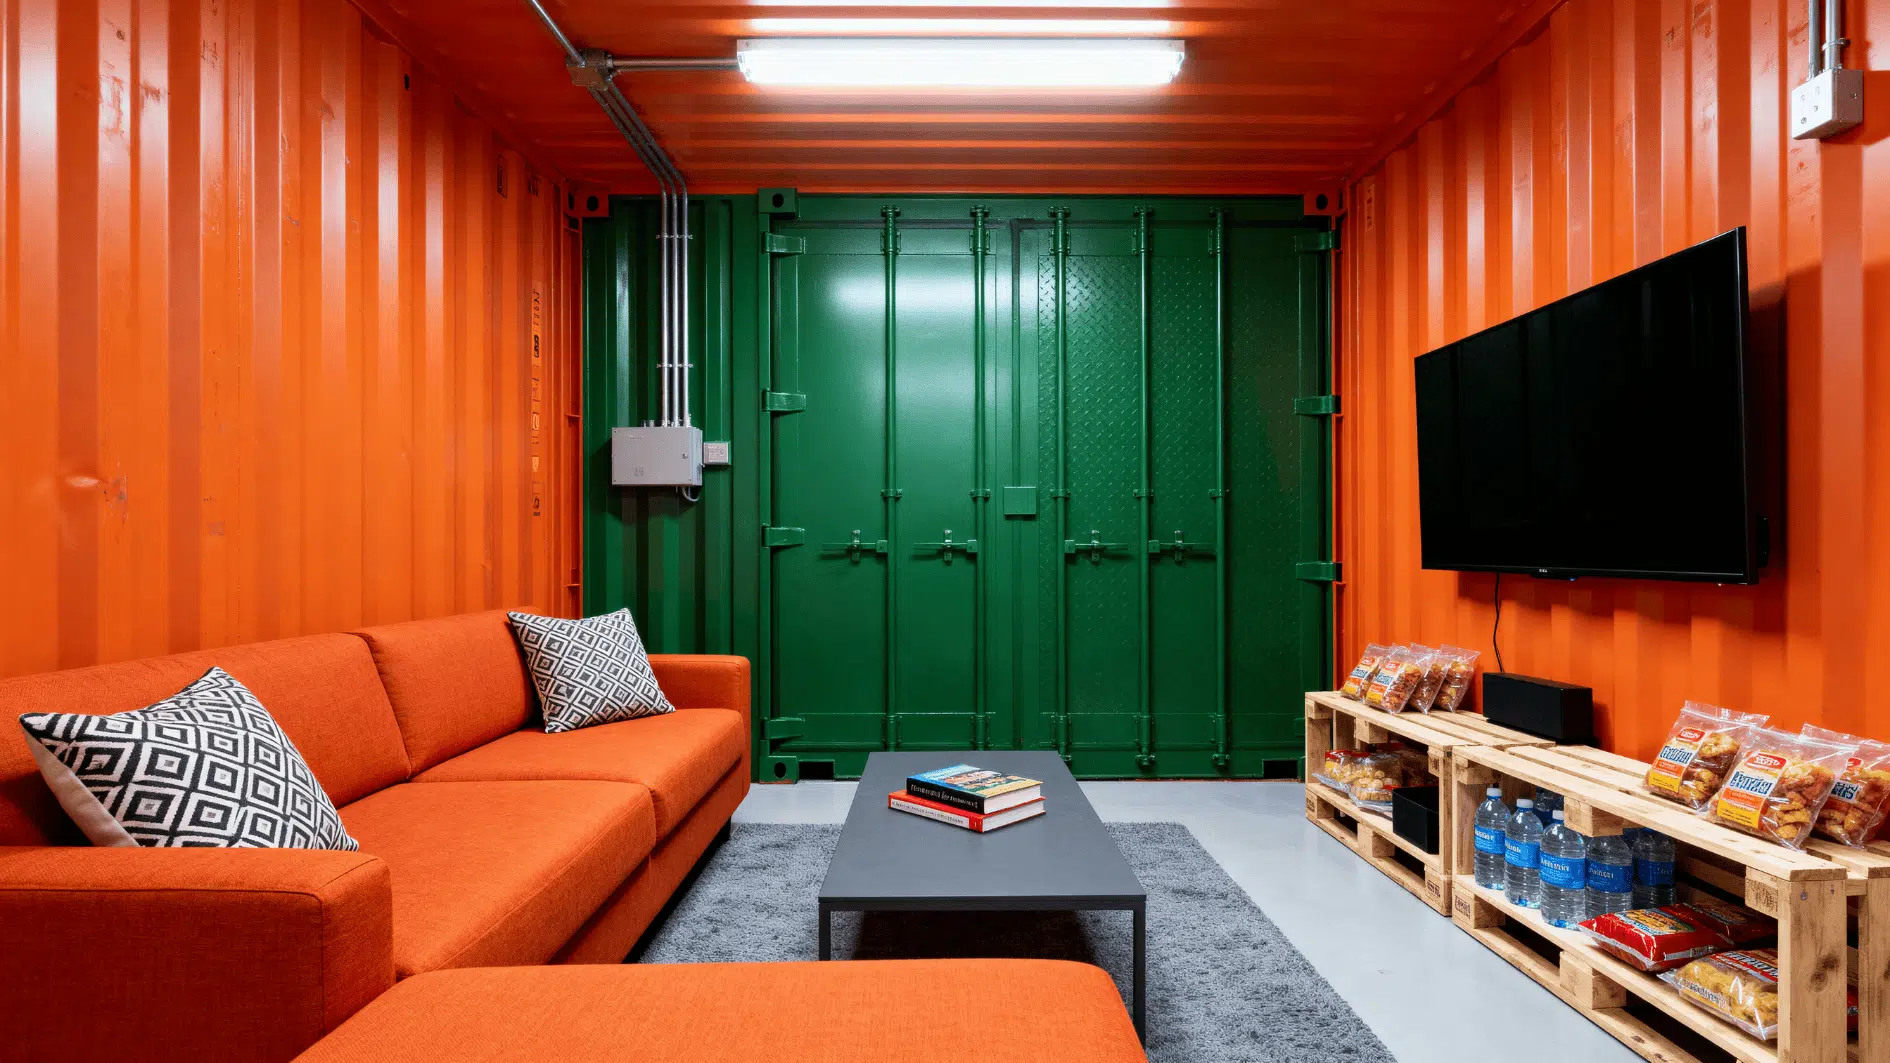
| Shipping Container Bunker | Uses a steel container for faster setup and structured build. A practical option for beginners. | Reinforcement (if underground), insulation, waterproofing |
A shipping container bunker is a practical option that combines strength and simplicity, making it easier to manage for beginners.
Step-by-Step Process to Build a Shipping Container Bunker
Following a structured process helps you stay organized and ensures each stage is completed correctly. This reduces errors and makes it easier to build a bunker in practice.
Materials Required
- Reinforced concrete for walls and base
- Steel beams or frames for structural support
- Waterproofing sheets or coatings to prevent moisture
- Ventilation pipes and air filters for airflow
- Heavy-duty doors and locking systems for security
Step 1: Plan Your Design and Layout
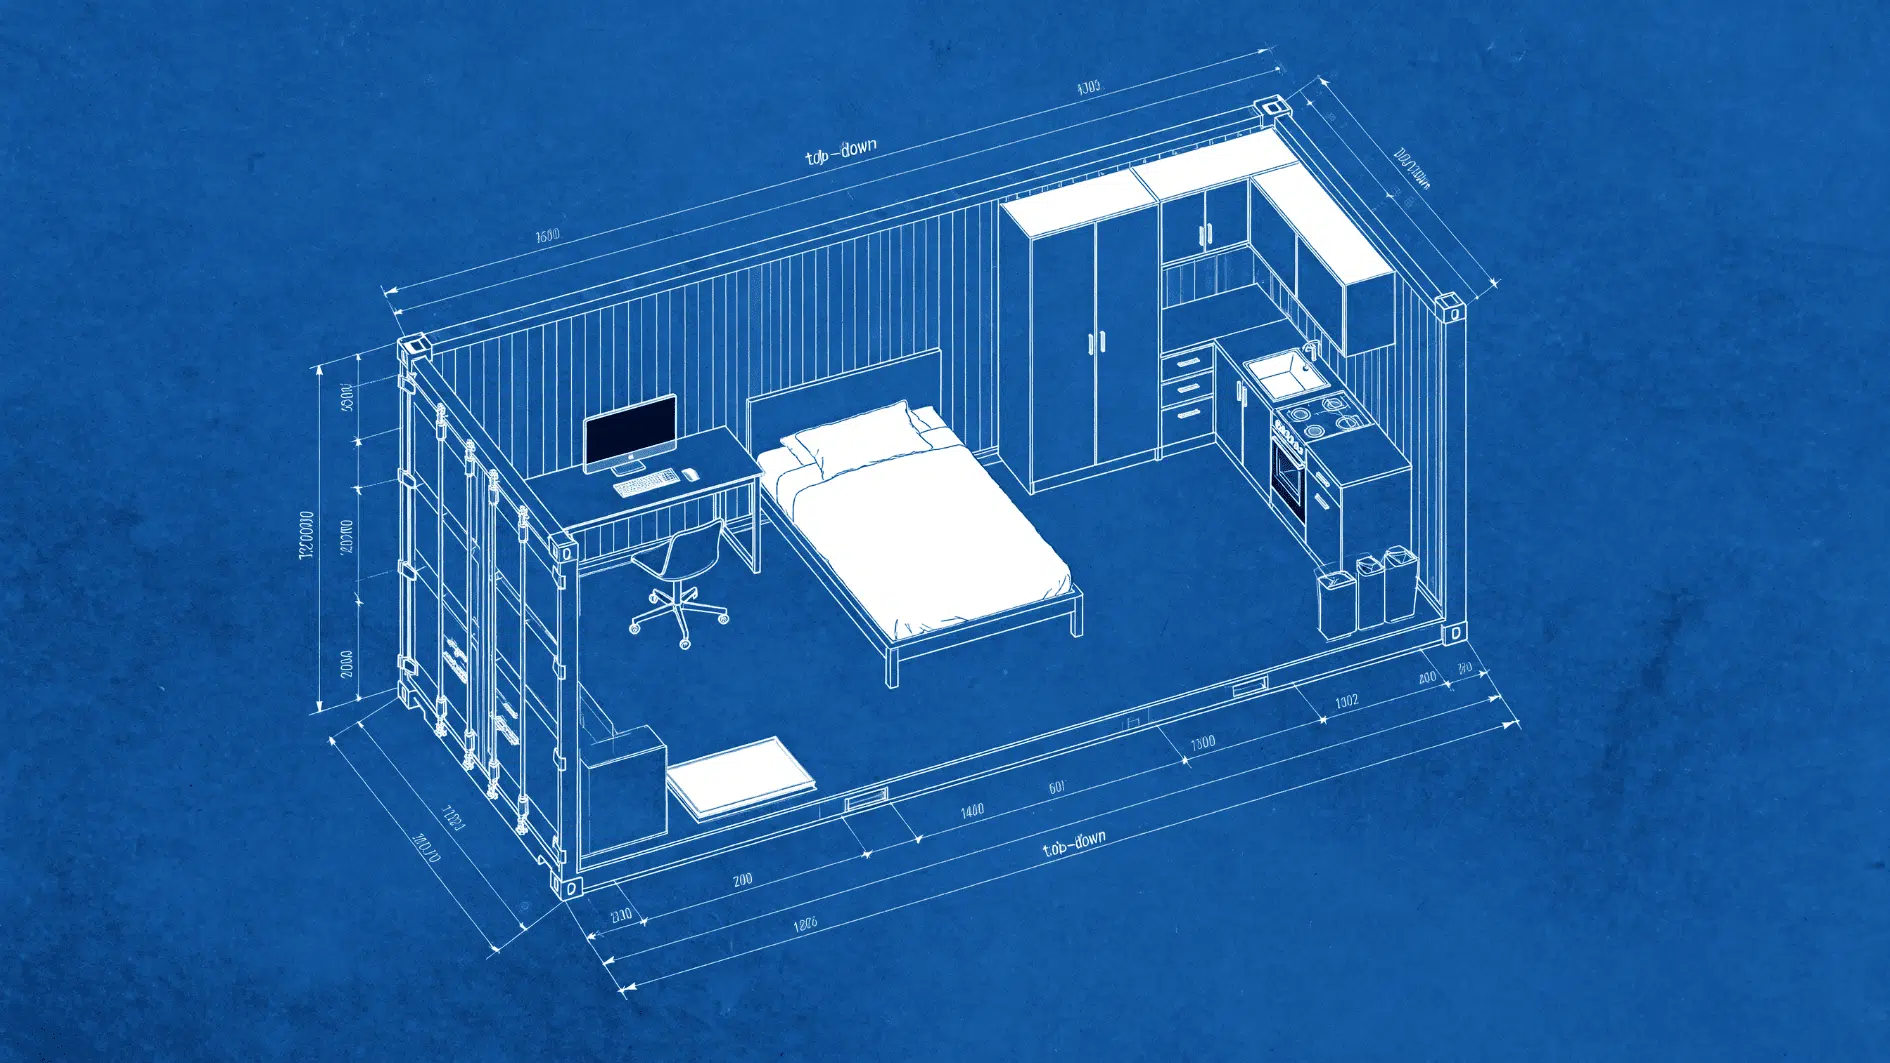
Start by deciding the size, layout, and purpose of your bunker. This includes planning sleeping space, storage, and movement areas.
- Sketch a simple layout with sections (entry, storage, rest area)
- Plan ventilation points and emergency exit
- Decide depth (for underground) or wall thickness (above ground)
- Estimate material requirements and budget
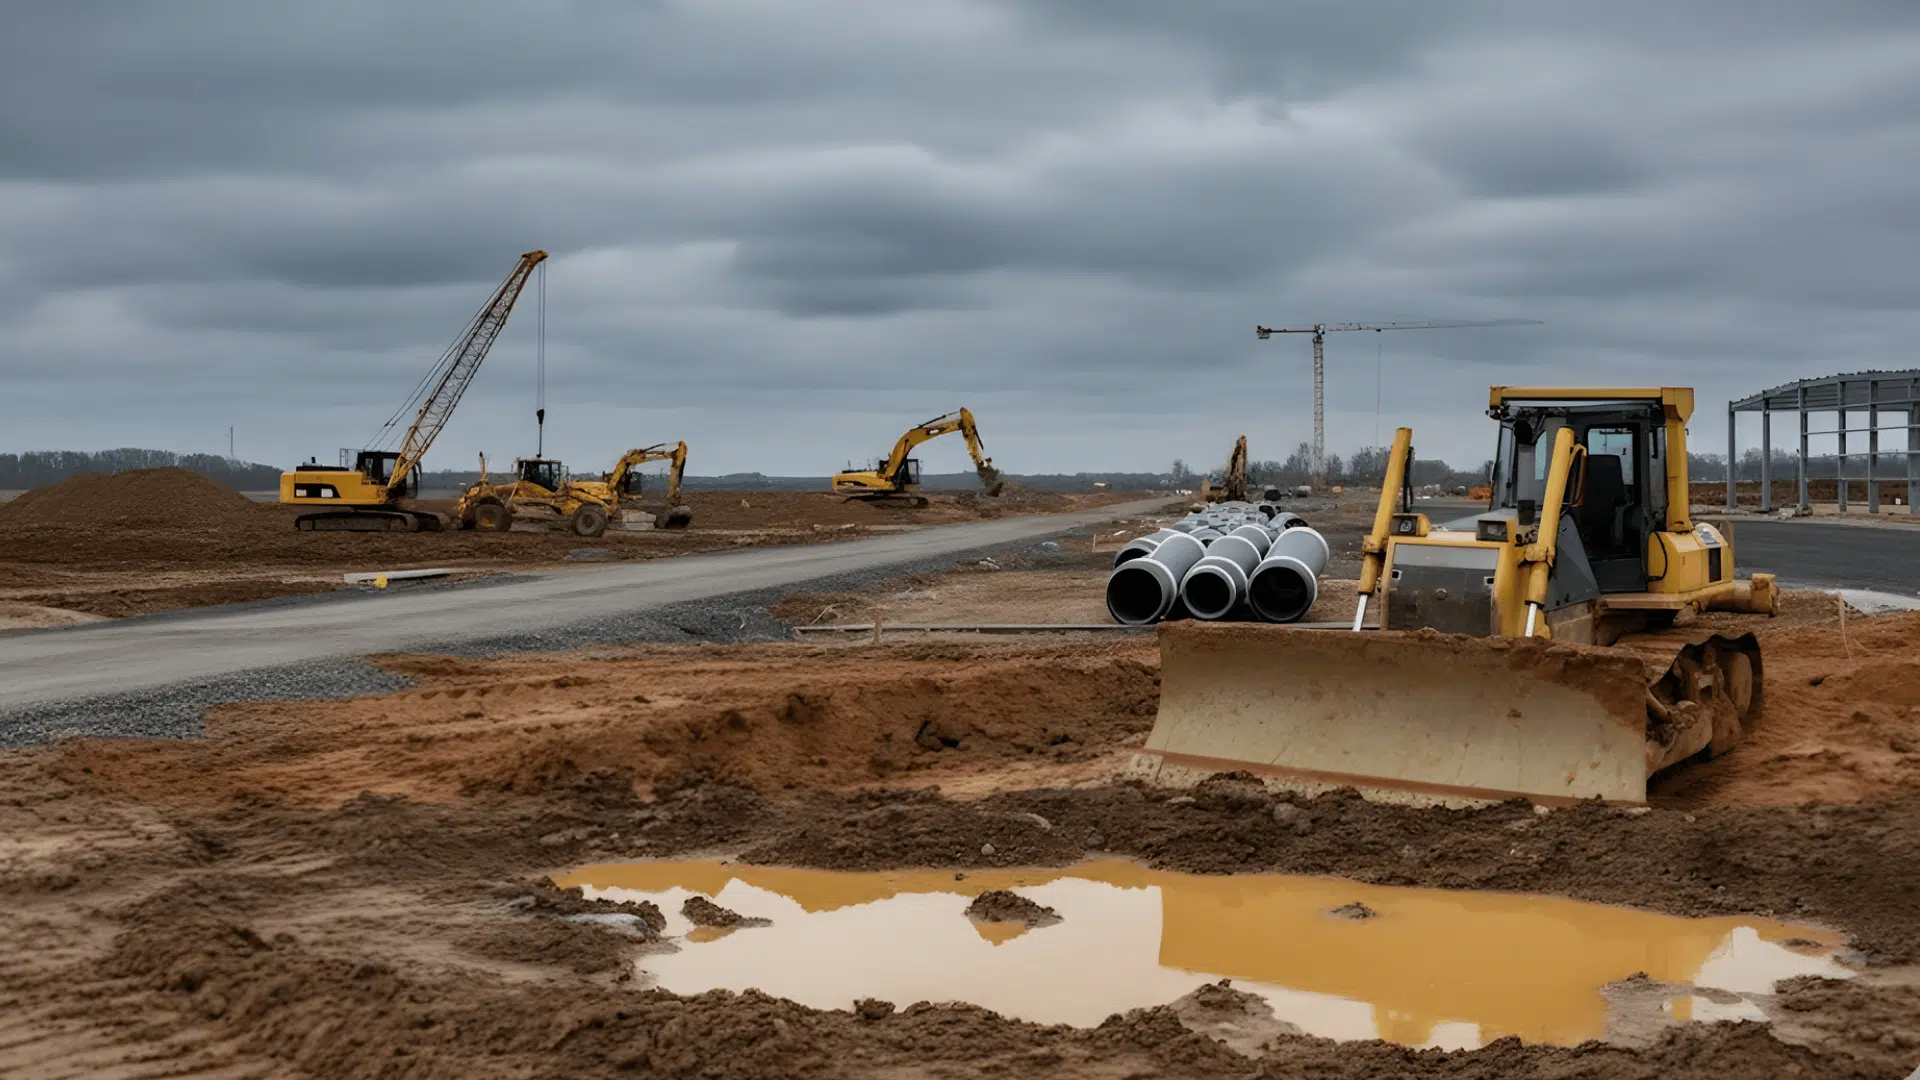
Step 2: Select and Prepare the Location
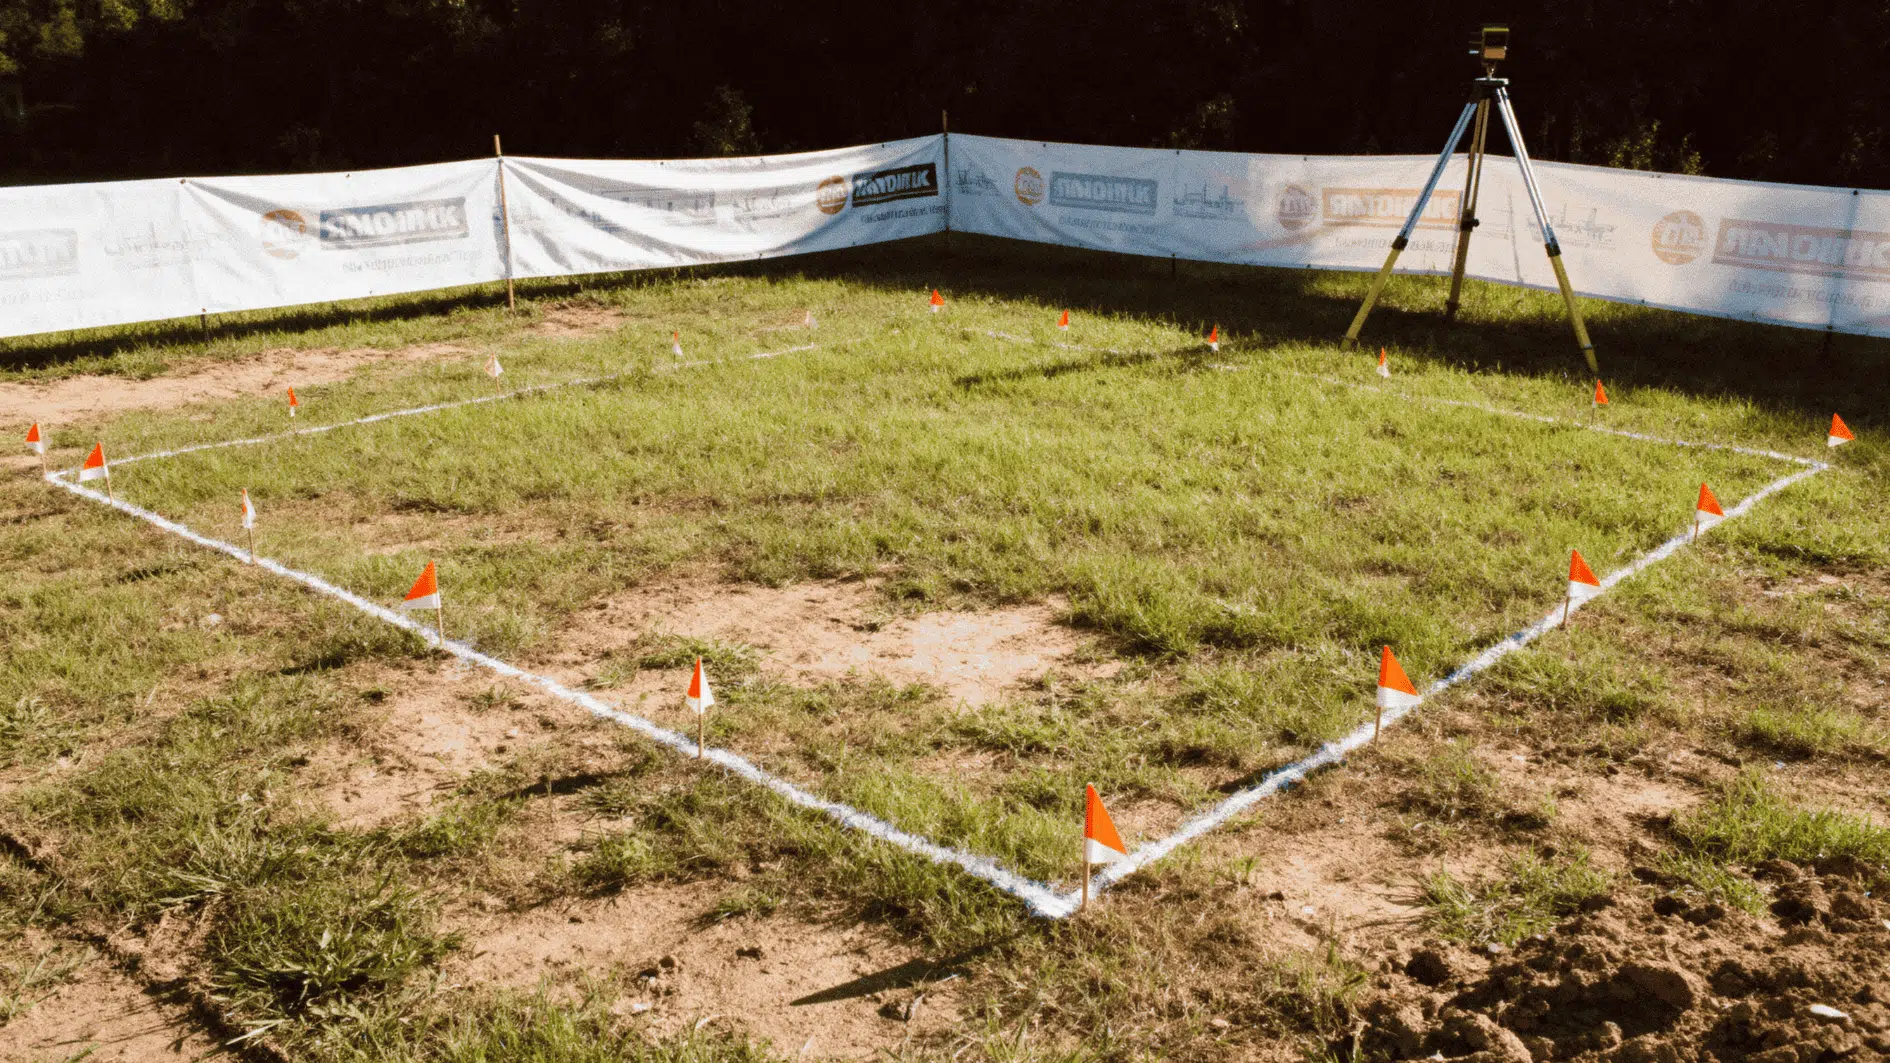
Choose a location that is stable, accessible, and safe from environmental risks. The right site improves durability and usability.
- Select firm soil and avoid waterlogged areas
- Clear the ground and remove debris
- Mark the exact area for construction
- Level the surface before starting work
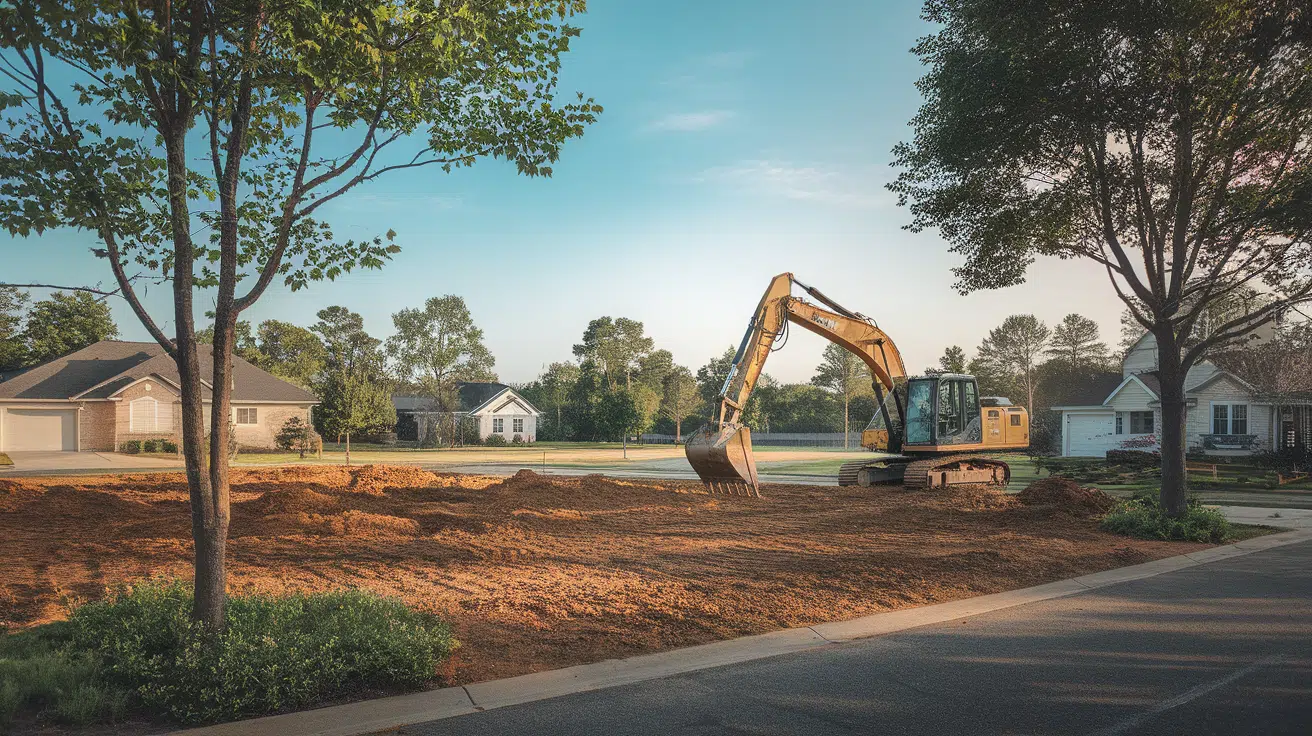
Step 3: Excavate the Area (for Underground Bunker)
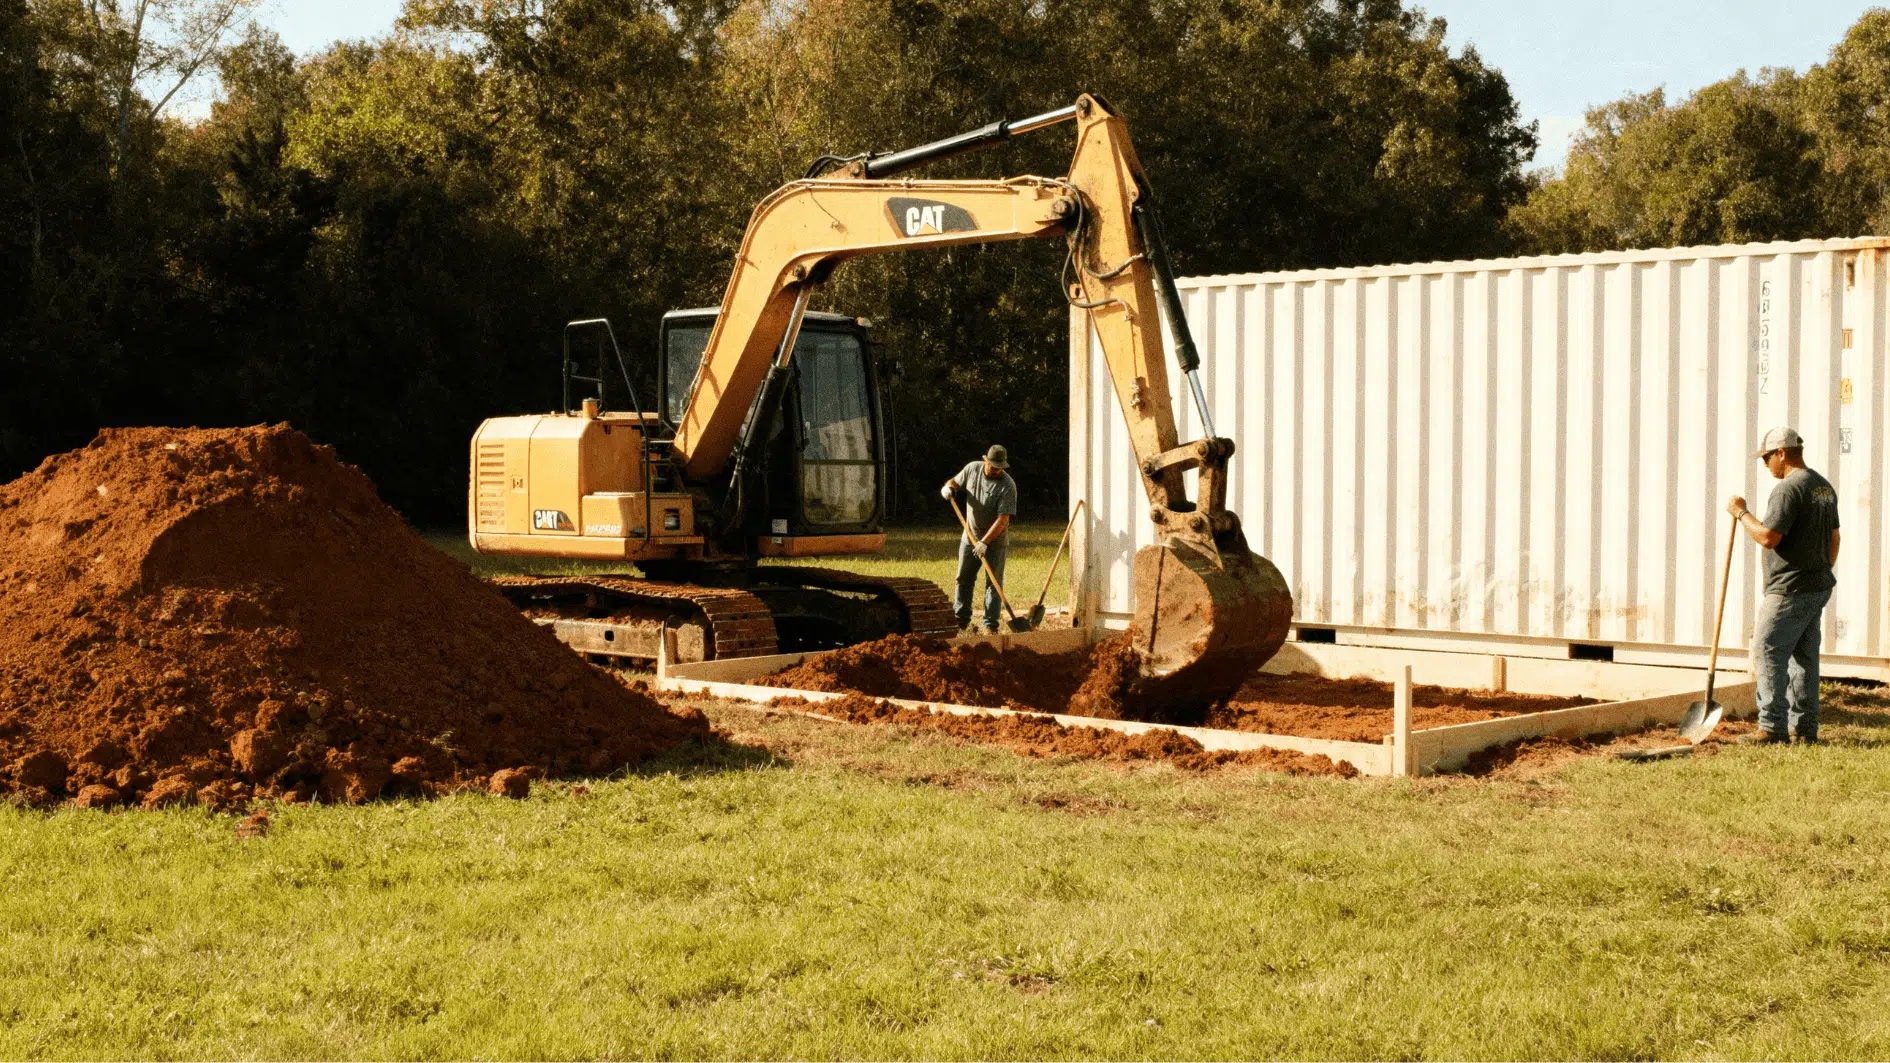
If you are building underground, excavation is a critical step. It creates space for the bunker structure.
- Dig according to your planned depth and size
- Keep walls sloped or supported to prevent collapse
- Ensure proper drainage at the base
- Compact the soil at the bottom for stability
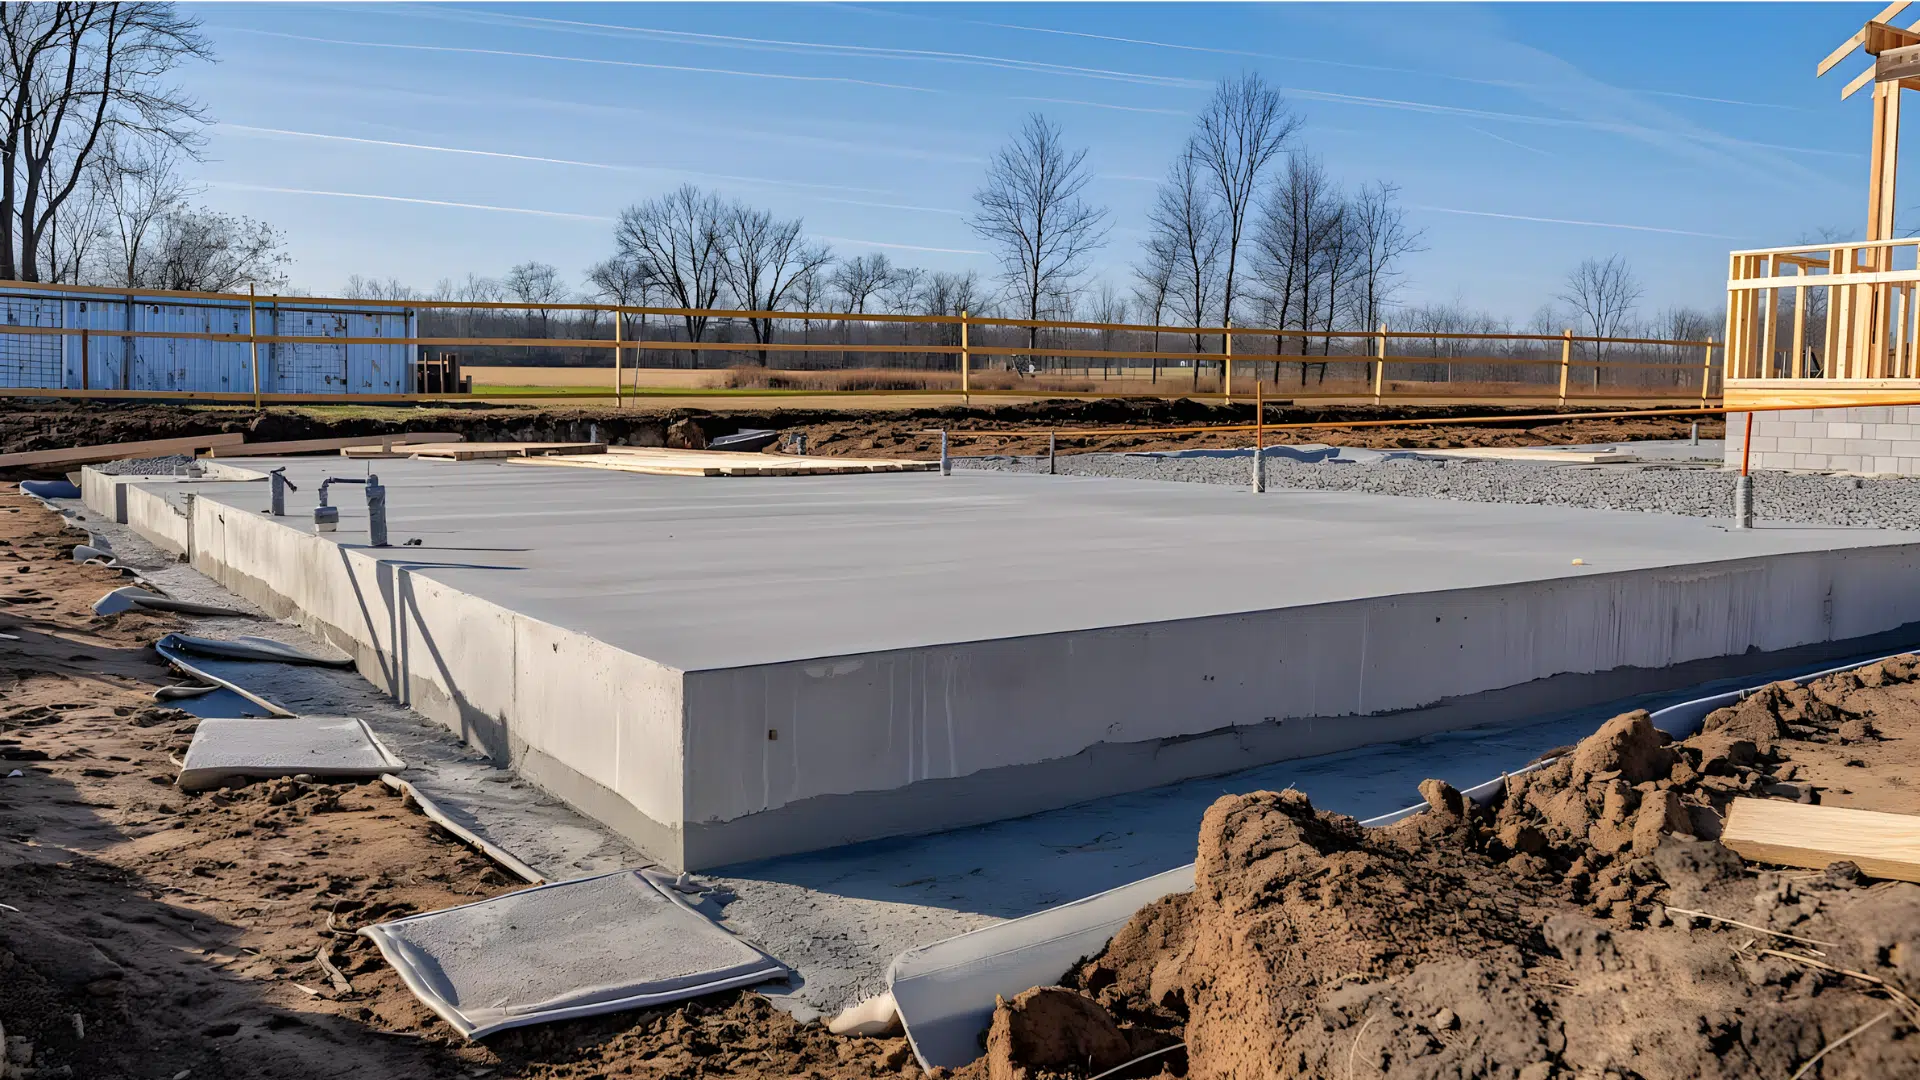
Step 4: Build the Base and Structure
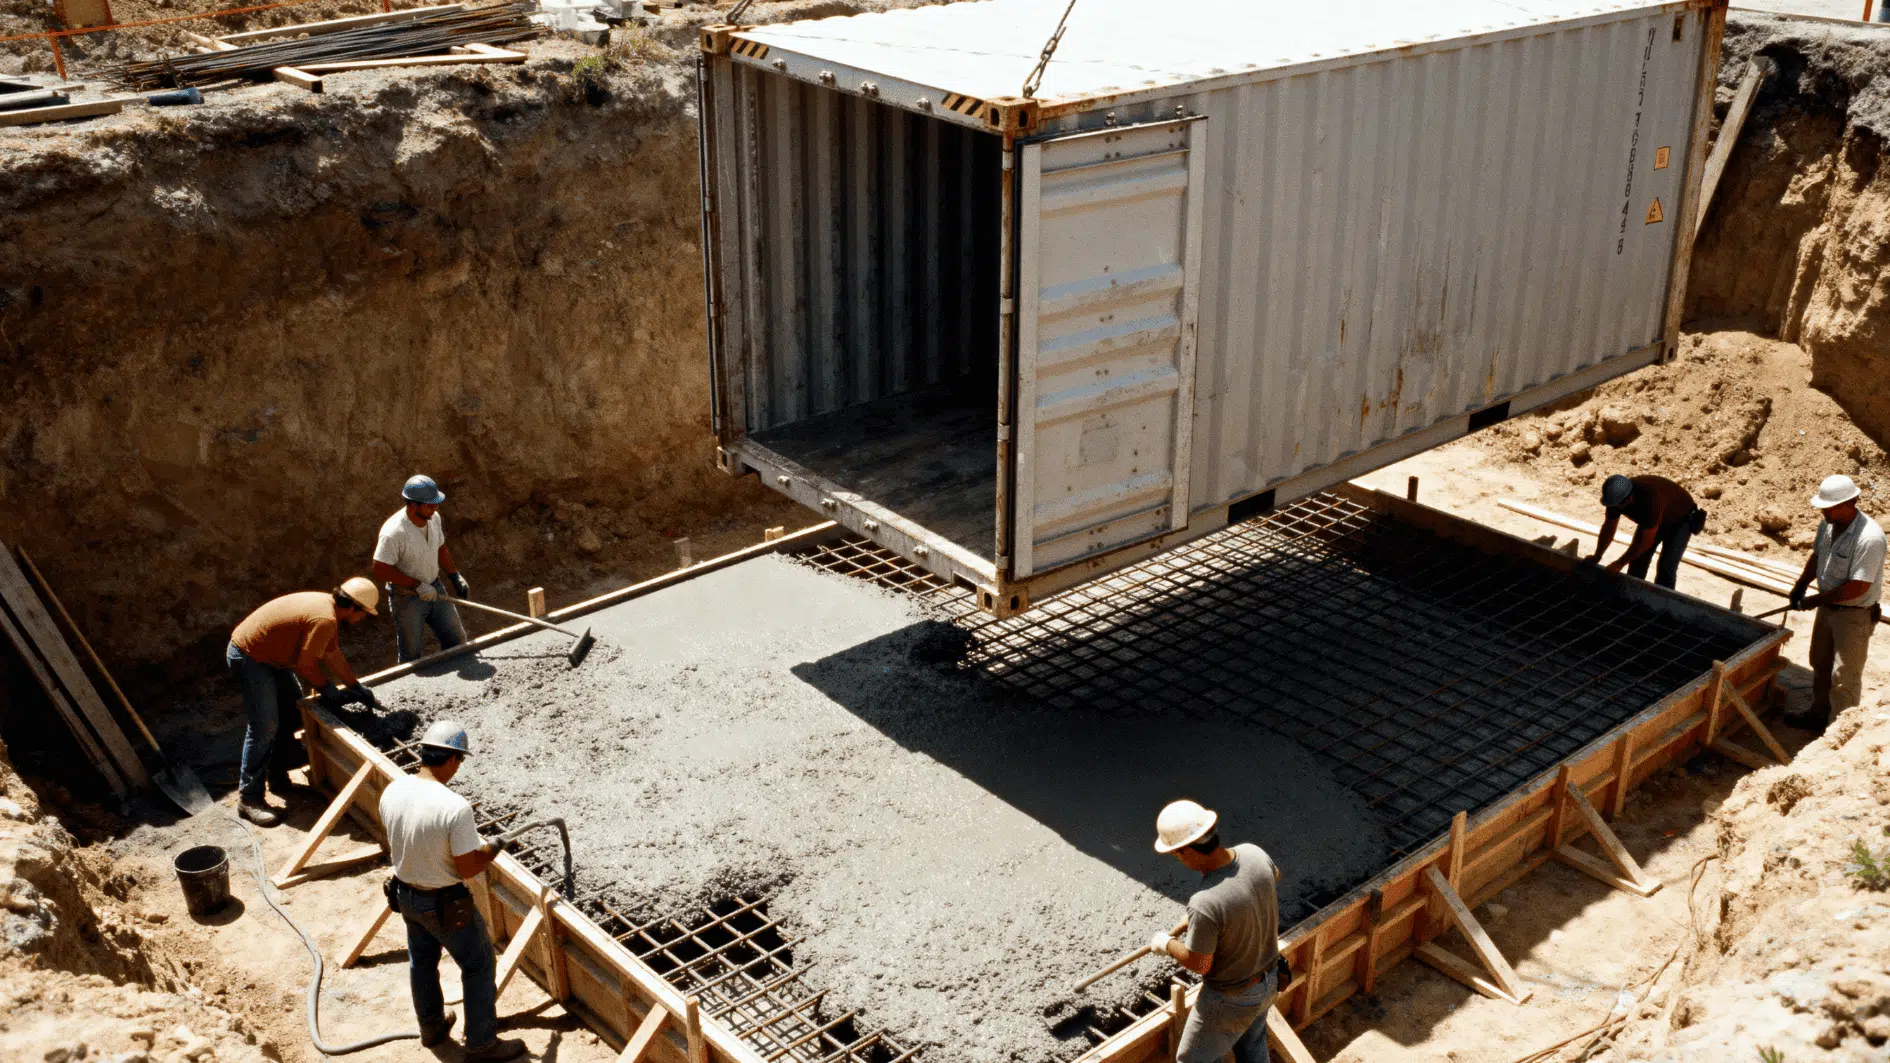
This step forms the core of your bunker. A strong structure ensures long-term safety and durability. Additionally, use metal beams and frames inside and around the container for better strength and rigidity.
- Lay a reinforced concrete base
- Build walls using concrete or install a shipping container bunker
- Add steel reinforcements for extra strength
- Construct a solid roof capable of handling pressure
Step 5: Install Waterproofing and Drainage
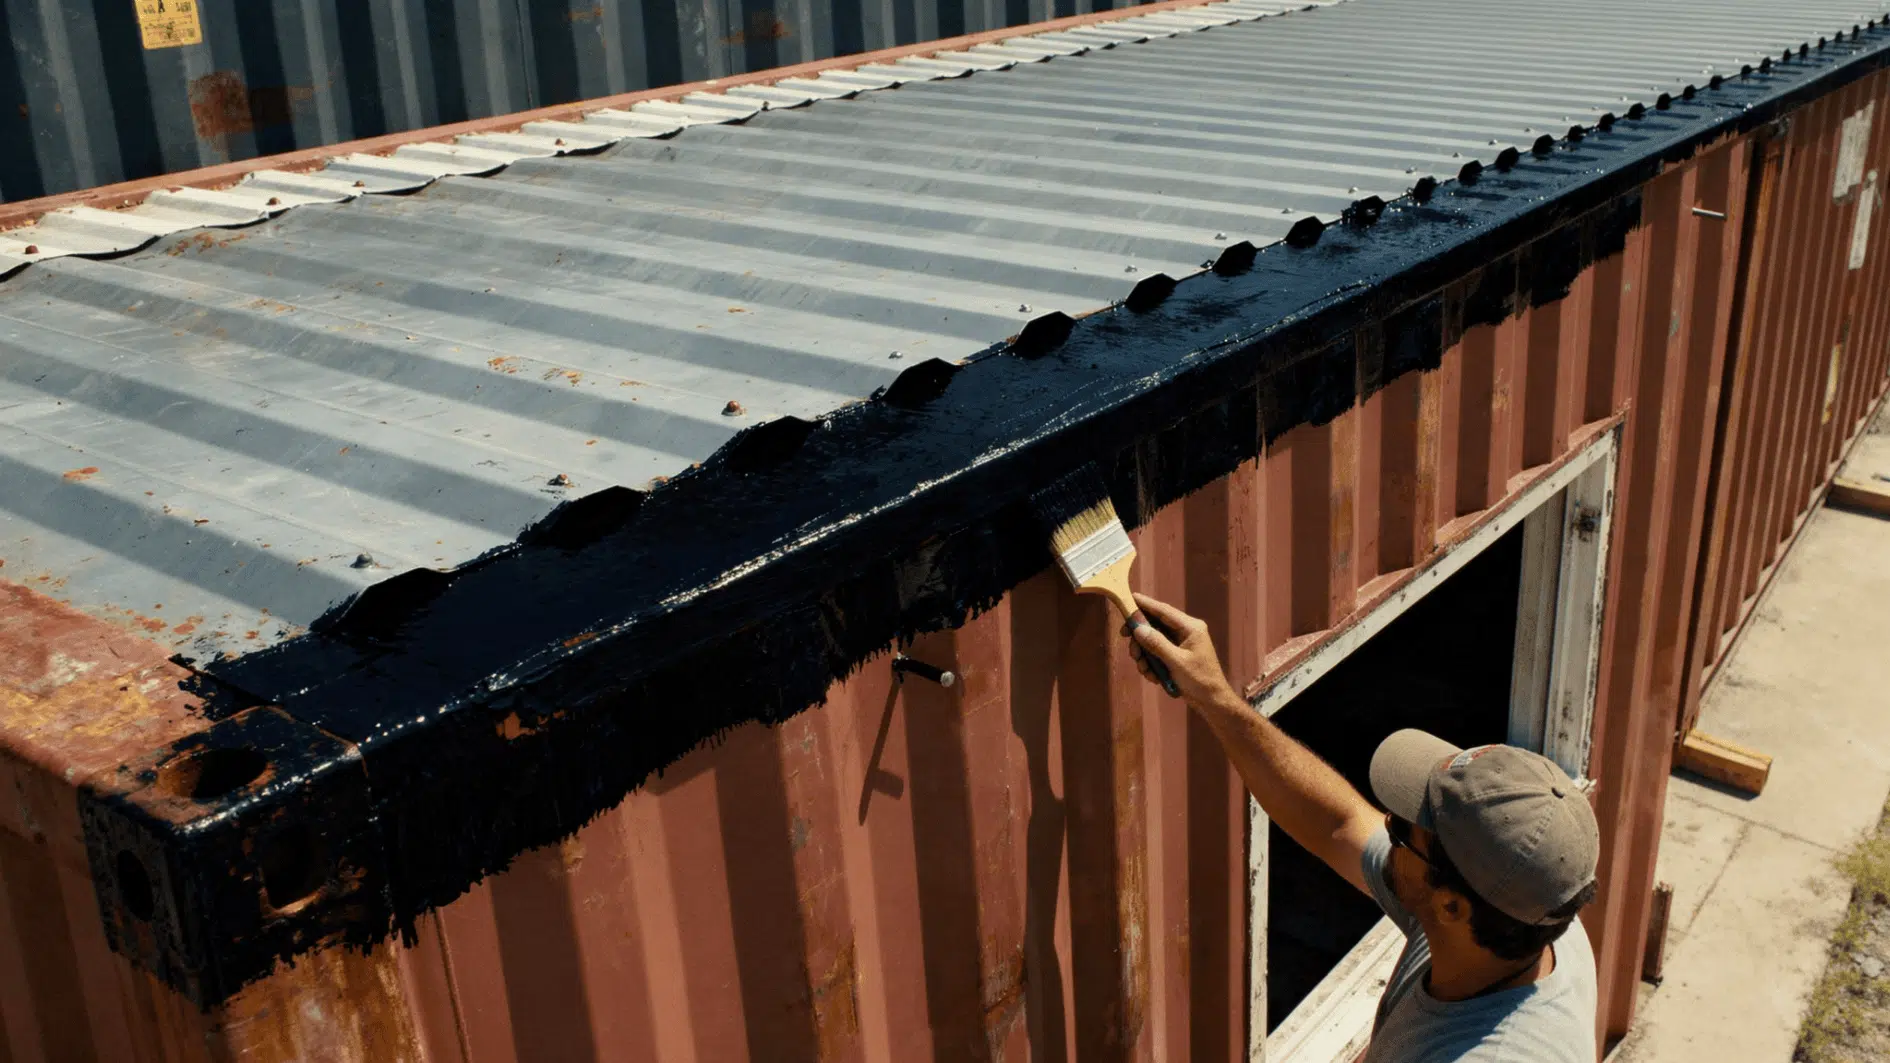
Water protection is essential to prevent damage and maintain usability. Without this step, moisture can weaken the structure.
- Apply waterproof coatings to the walls and the roof
- Install drainage pipes around the bunker
- Add a gravel layer for water flow
- Seal all joints and openings properly
Step 6: Set up Ventilation System
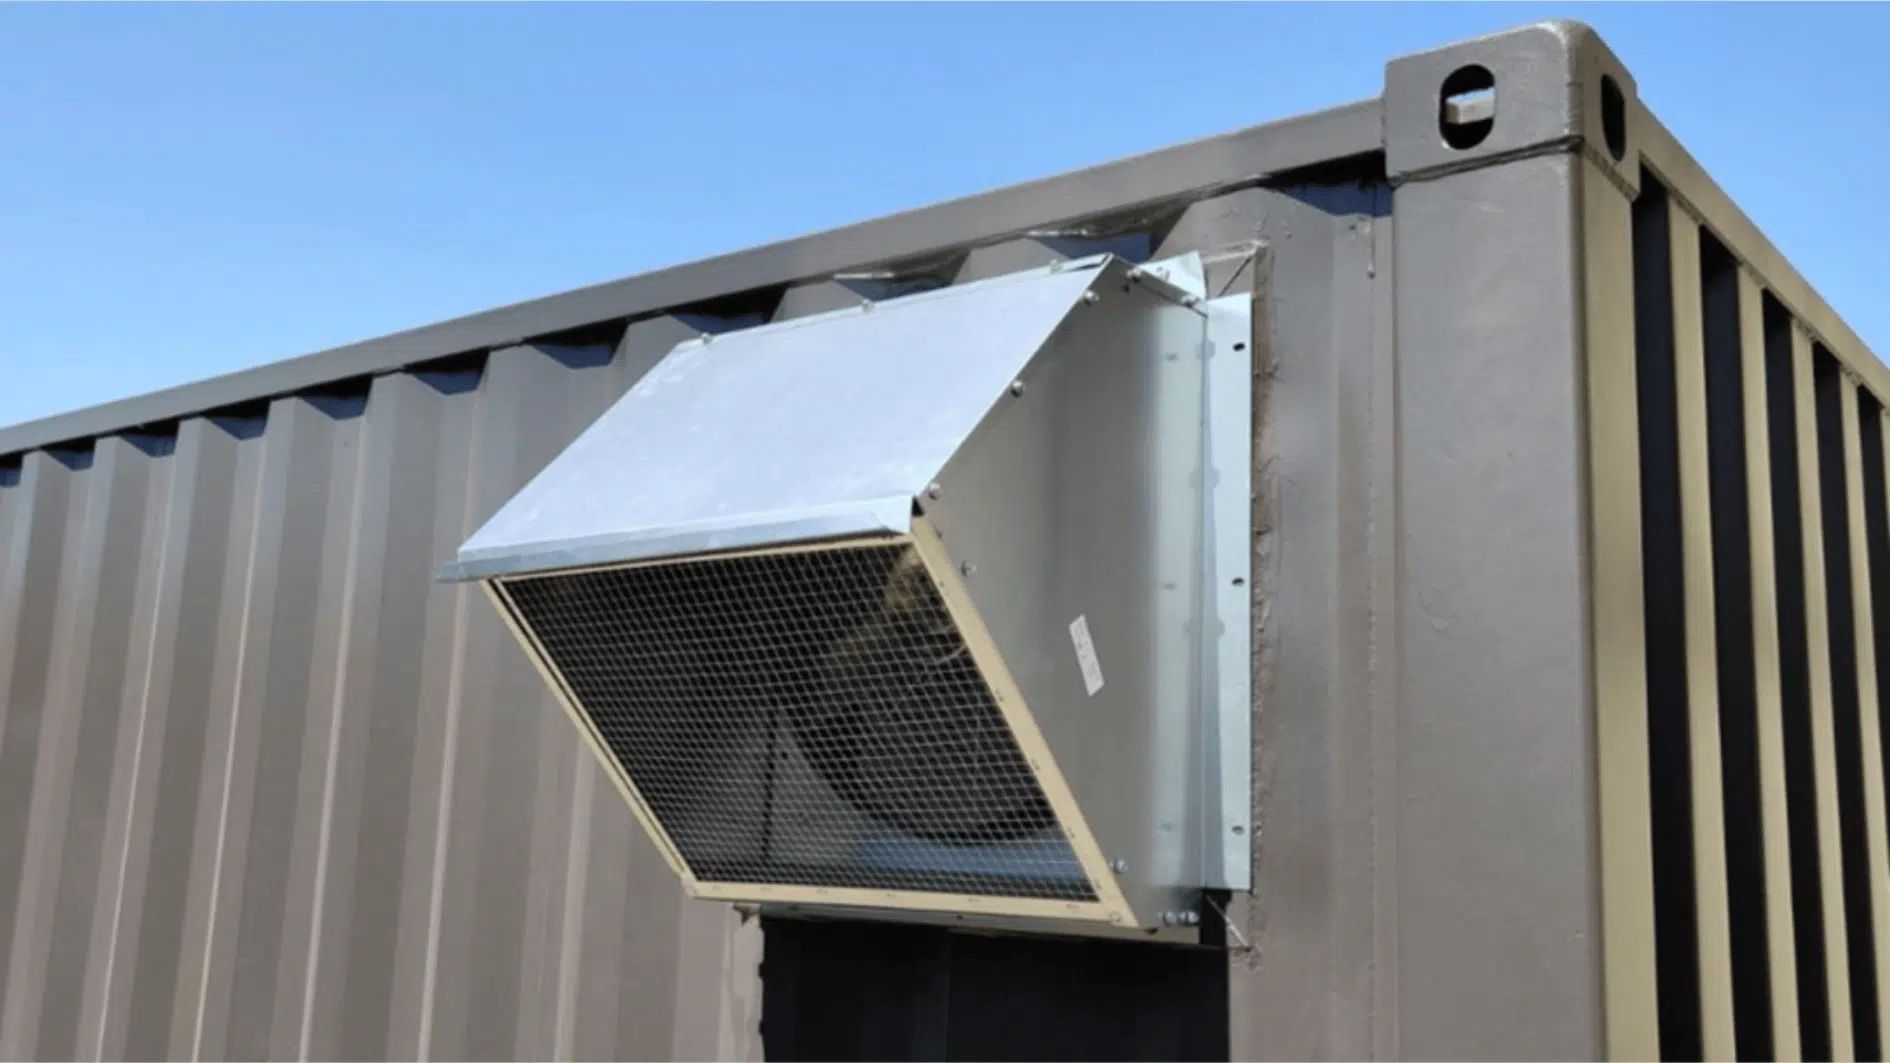
Proper airflow is necessary for safety and comfort inside the bunker. A good ventilation system ensures breathable air.
- Install air intake and exhaust pipes
- Use filters to clean incoming air
- Position vents at different heights for circulation
- Ensure vents are protected from external blockage
Step 7: Install Entry and Emergency Exit
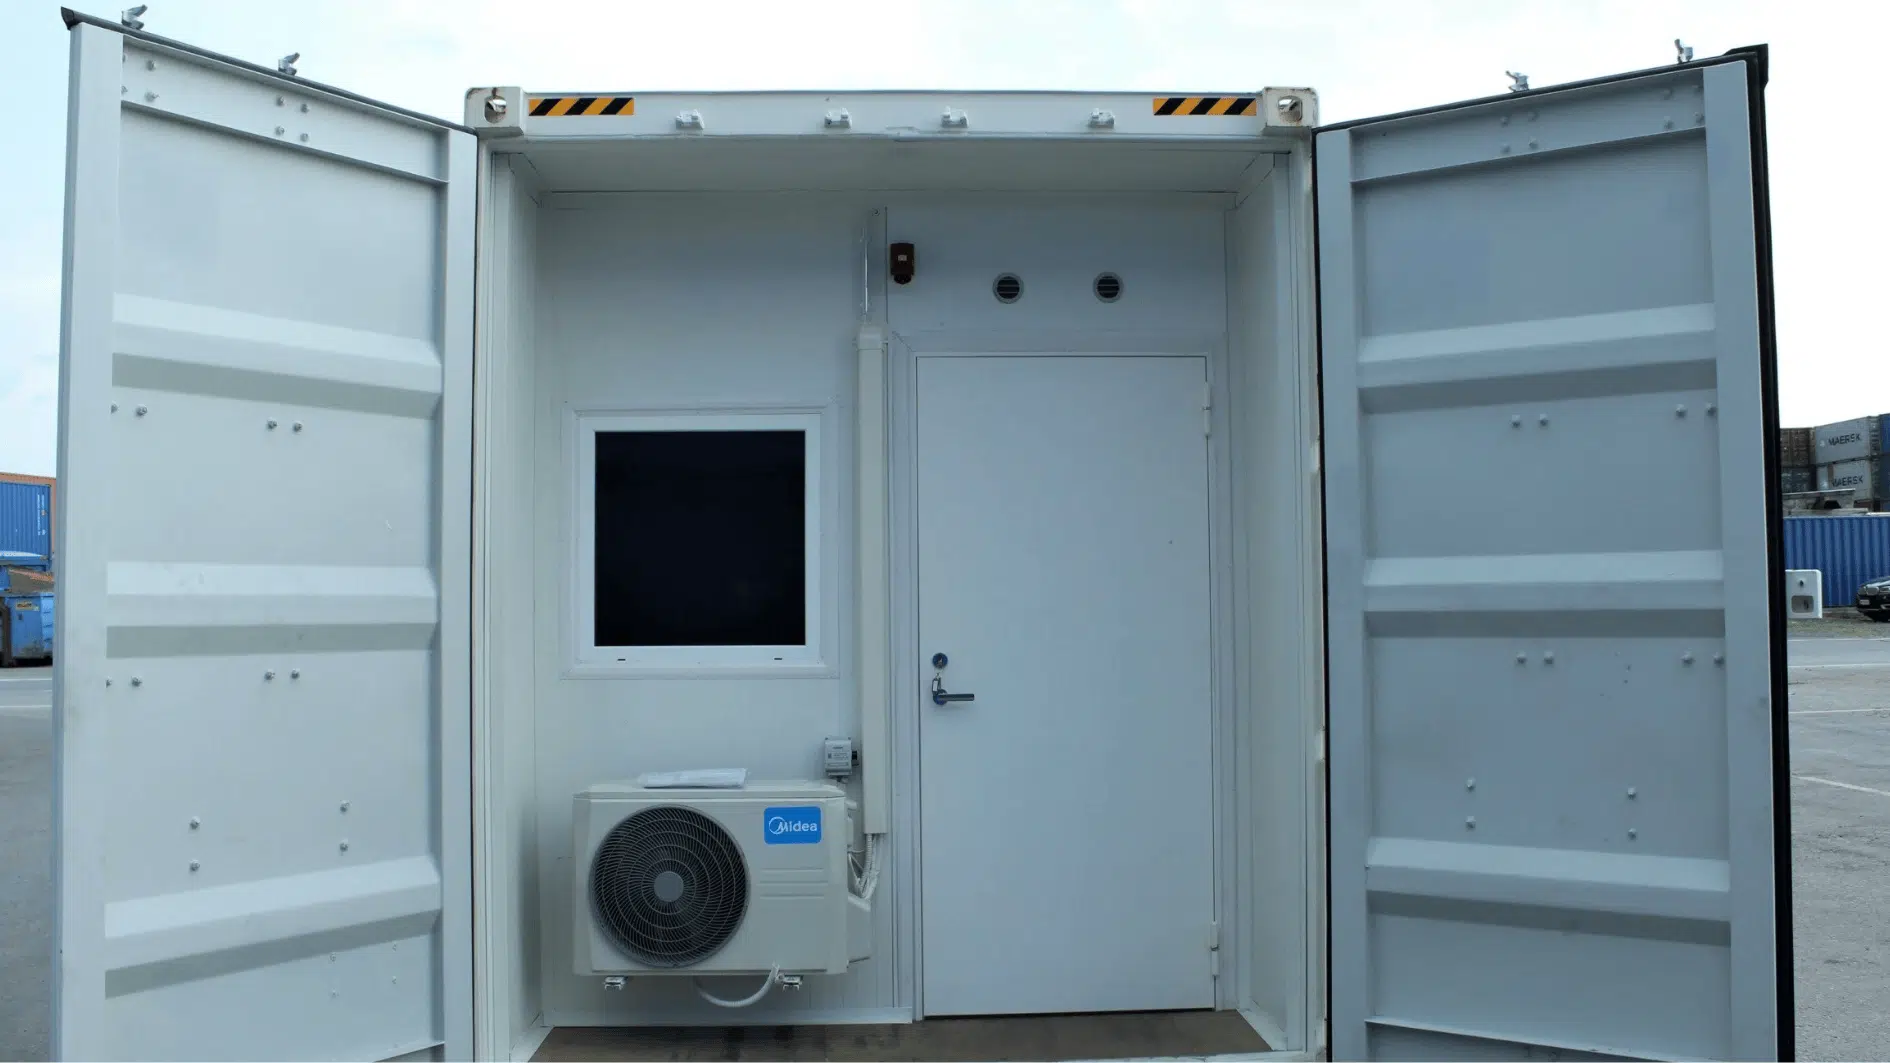
Safe access points are important for both daily use and emergencies. You should always have more than one way in and out.
- Install a strong, secure main door
- Add an emergency exit in a separate location
- Use airtight sealing for protection
- Ensure easy opening from the inside
Step 8: Final Inspection and Testing
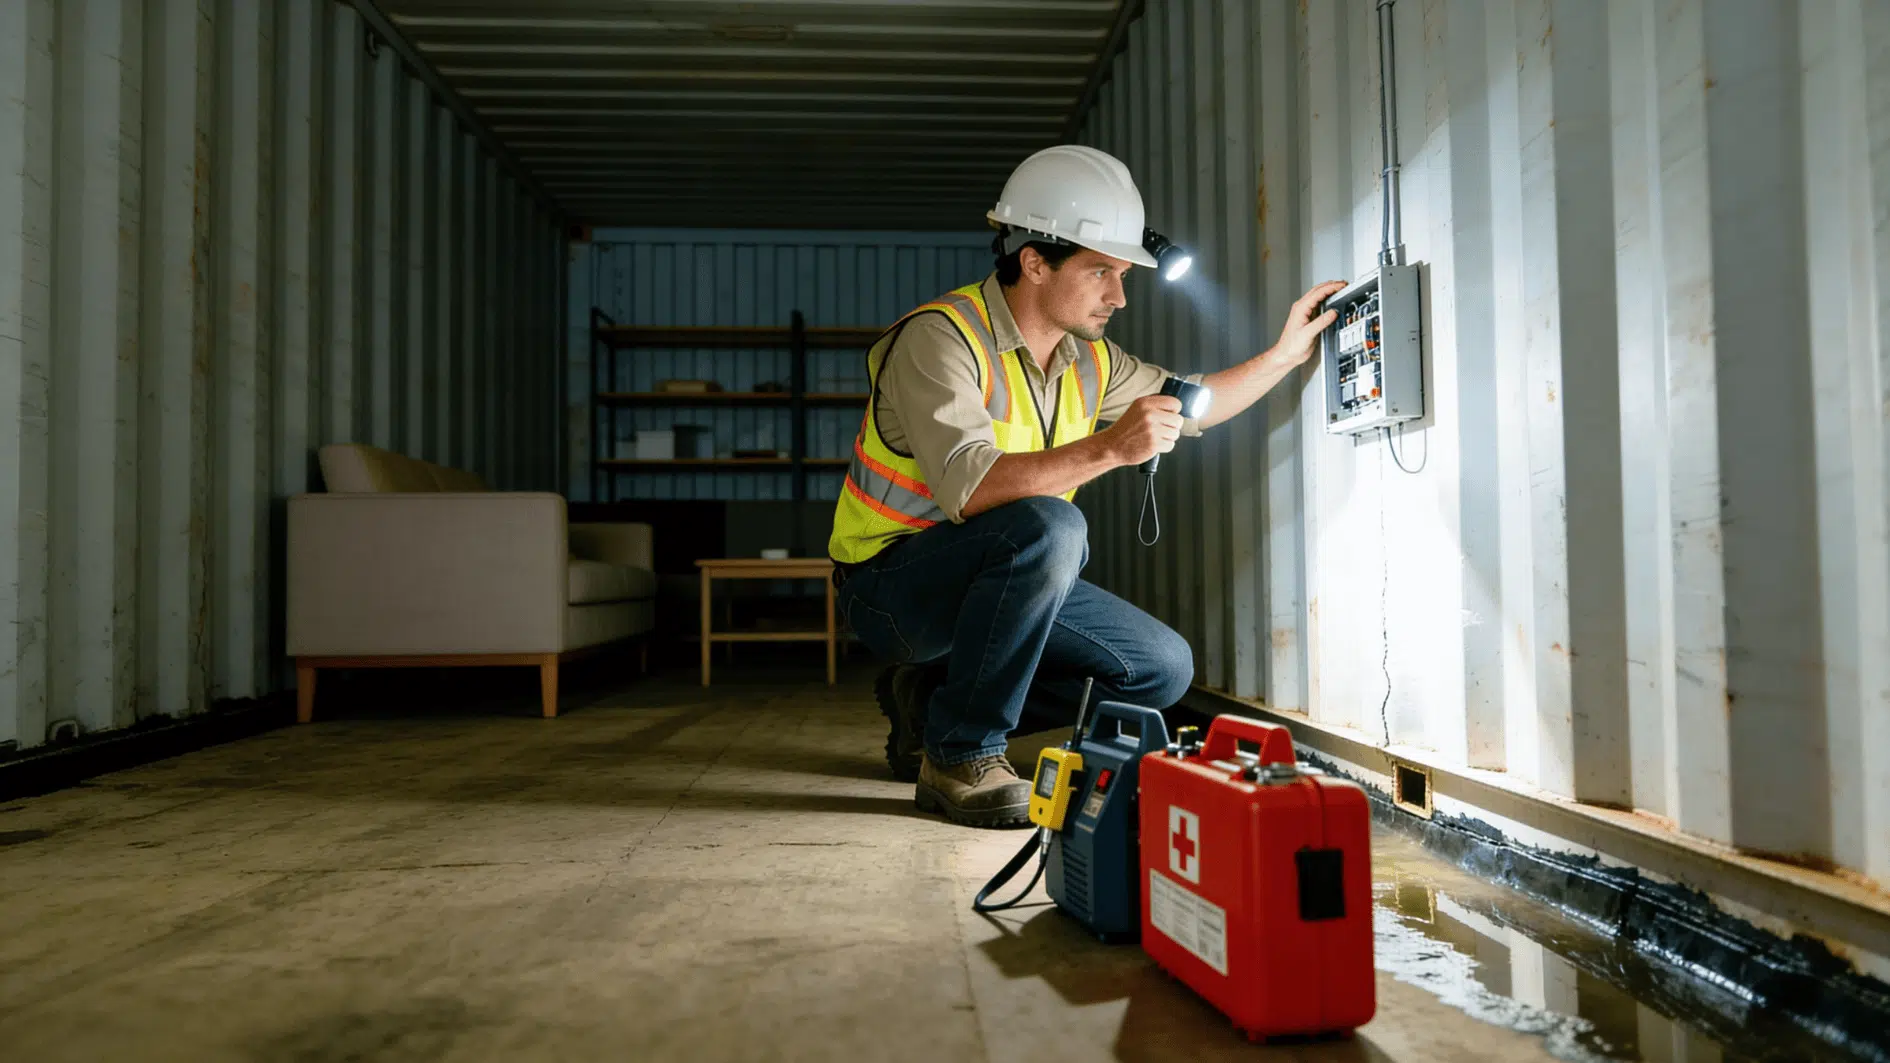
Before using your bunker, check all systems to ensure everything works properly. This step confirms safety and readiness.
- Inspect the structure for cracks or weak points
- Test ventilation and airflow
- Check waterproofing and drainage
- Ensure entry and exit points function smoothly
Step 9: Set Up Interior Space
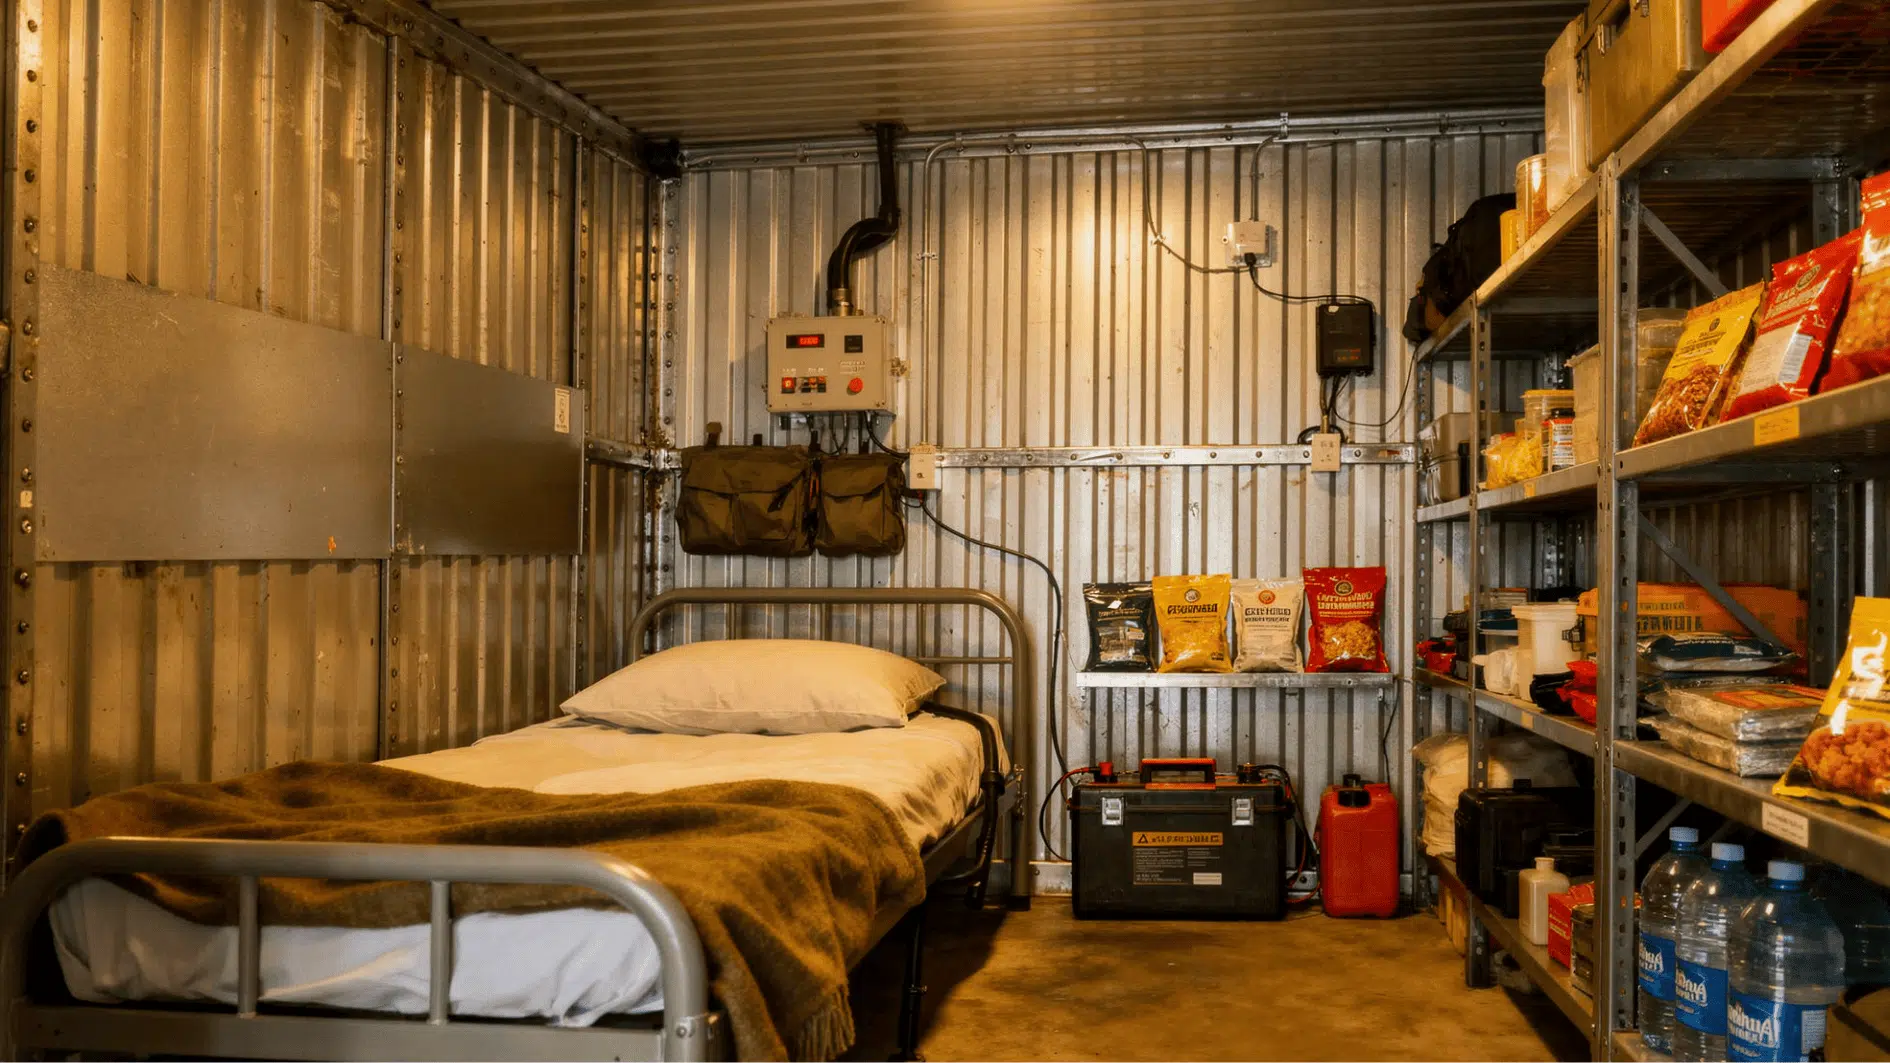
Once the structure is complete and inspected thoroughly, you can prepare the interior for use. This step makes the bunker functional and comfortable.
- Arrange sleeping and storage areas
- Install basic lighting (battery or solar-based)
- Store essential supplies like food and water
- Keep tools and emergency kits accessible
Safety Features to Include
Safety features are essential to ensure your bunker remains usable and secure. Without them, the bunker may not function properly in critical situations.
| Feature | Purpose | Benefit |
|---|---|---|
| Ventilation system | Ensures proper airflow | Prevents suffocation and maintains fresh air inside |
| Reinforced door | Provides secure entry | Protects against external threats and forced entry |
| Emergency exit | Offers an escape route | Improves safety during unexpected situations |
| Waterproofing system | Stops water from entering | Prevents leaks and protects the structure |
| Air filtration unit | Cleans incoming air | Keeps air safe from dust and harmful particles |
| Structural reinforcement | Strengthens walls and roof | Increases durability and long-term stability |
DIY Bunker: Budget and Cost Planning
Planning a DIY shipping container bunker starts with understanding your total costs. A basic used shipping container can cost between $2,000 and $5,000, depending on size and condition.
Beyond that, site preparation, insulation, ventilation, and waterproofing can add another $3,000 to $10,000.
If adding features like filtration systems or reinforced doors, costs will increase further. Labor can be saved with DIY work, but specialized tasks like structural reinforcement or electrical setup may still require professionals.
Setting a clear budget early helps avoid overspending and ensures all essential safety features are included.
Maintenance and Long-Term Use
Keeping your bunker in good condition helps it stay safe and ready when needed. Regular checks can prevent small issues from turning into costly repairs.
- Inspect key systems regularly: Check ventilation, drainage, and structural parts for leaks, cracks, or blockages. Fixing minor issues early helps avoid bigger problems later.
- Maintain stored supplies: Rotate food, monitor water storage, and test emergency equipment. This ensures everything stays usable and ready in case of need.
- Watch for moisture and damage: Look for signs of water entry or rust inside the container. Controlling moisture helps protect both the structure and your supplies.
- Keep everything organized: Arrange supplies neatly so they are easy to access during emergencies. A well-organized space improves efficiency and safety.
Conclusion
Building a bunker requires careful planning, proper materials, and a clear understanding of each step. When you follow a structured approach, the process becomes more manageable and effective.
By learning to build a bunker, you can create a secure space tailored to your specific needs. Options like a shipping container bunker make the process simpler while maintaining strength and durability.
With the right setup and regular maintenance, your bunker can provide long-term safety, storage, and peace of mind.