Storms can be scary, and I know many families, including mine, look for ways to stay safe when severe weather hits.
Traditional storm shelters are often expensive or difficult to access, which is why I began exploring alternative options. One solution I found is using shipping containers.
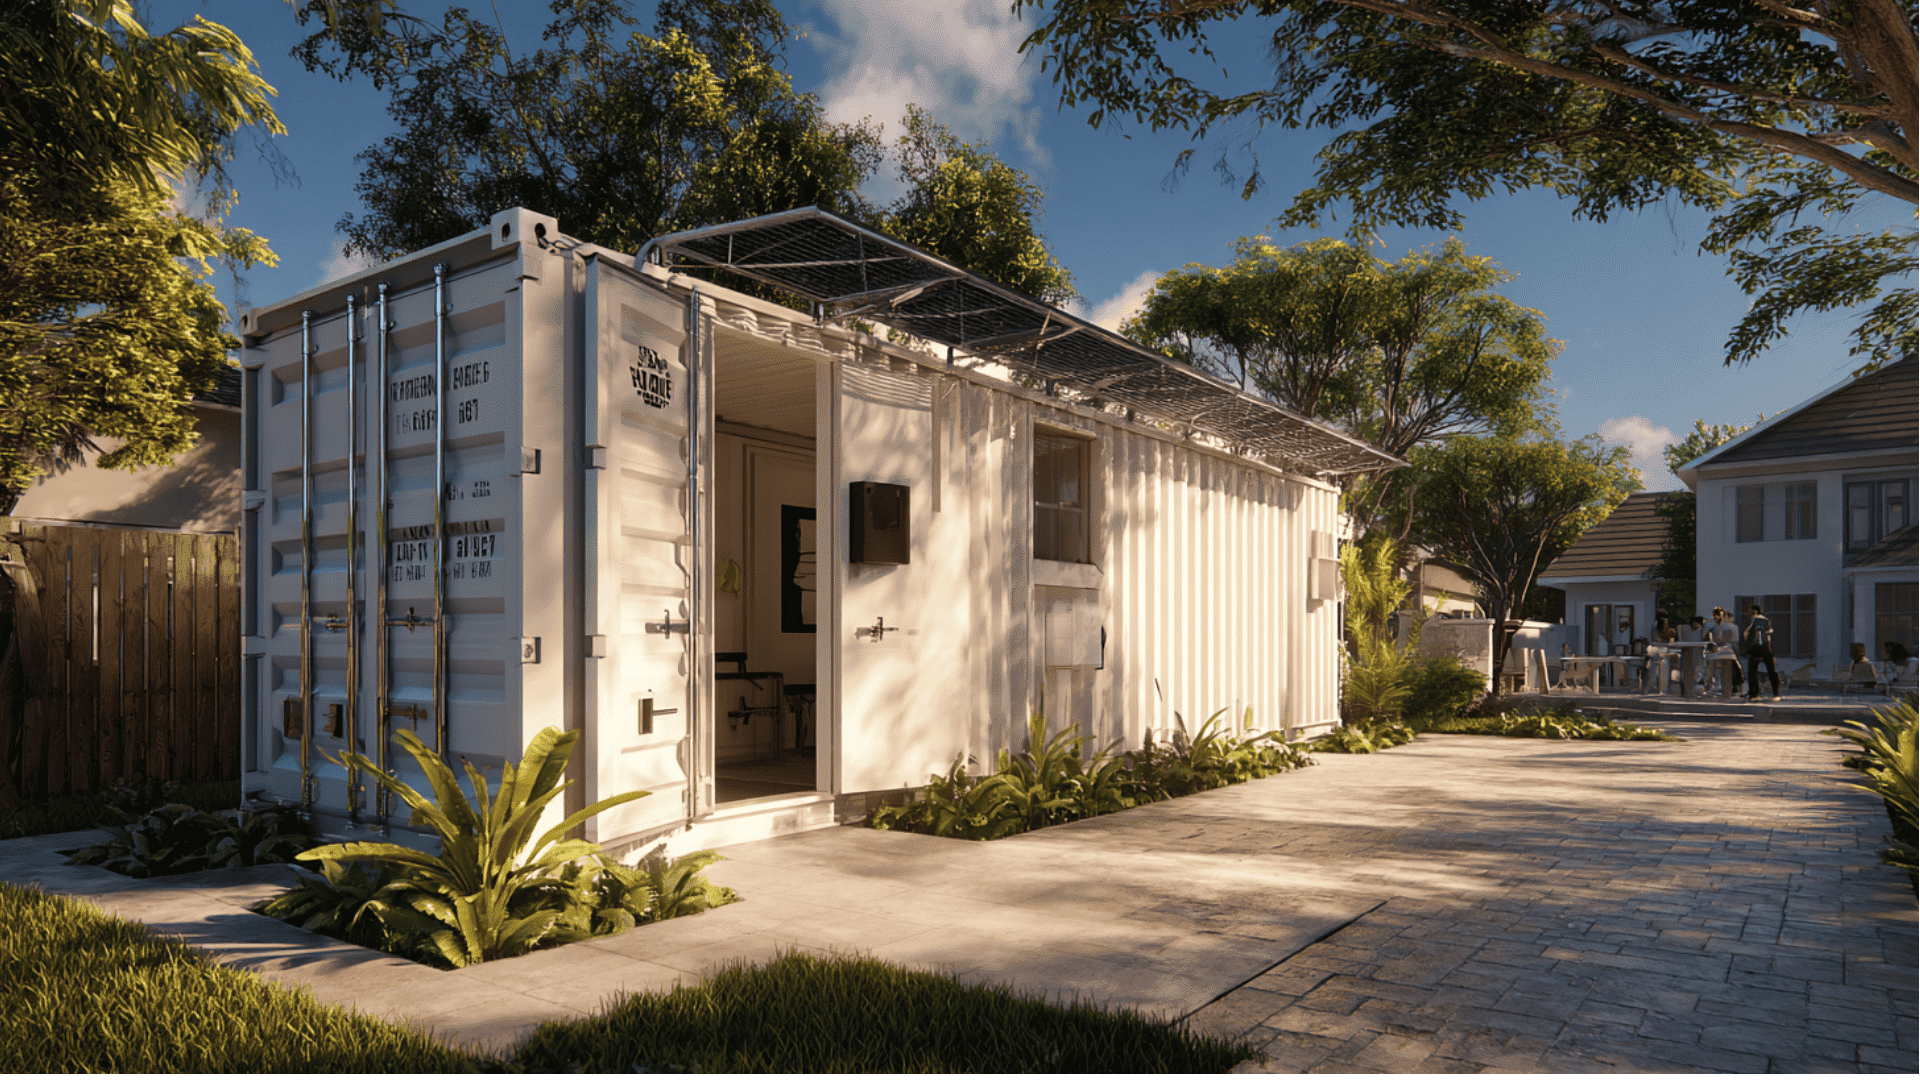
A shipping container storm shelter is created by modifying a steel container to withstand strong winds, flying debris, and other hazards.
With the right materials and changes, I believe a container can become a secure place to ride out a storm.
In this guide, I’ll walk you through what a container storm shelter is, the benefits and challenges, how to build one step by step, and what you need to know before getting started.
What is a Shipping Container Storm Shelter?
A shipping container storm shelter is a steel shipping container that is converted into a protective space for emergencies.
These containers were designed for shipping goods worldwide, making them strong, portable, and readily available.
The steel structure is capable of handling heavy loads. They are cheaper than building a shelter from scratch and can be sourced from shipping yards or sellers.
Some people also refer to them as storage container storm shelters; with certain modifications, they can be made safer and more reliable.
They can be used above ground or underground to provide safe shelter for people during extreme weather conditions.
Things to Consider Before Building a Storm Shelter
Before you begin, it’s important to know the limits of using a shipping container storm shelter.
- Structural strength containers are not designed to resist soil pressure when buried. Without reinforcement, walls may bend.
- Rust and corrosion. Steel can rust quickly when exposed to moisture, so waterproofing is essential.
- Ventilation Without airflow, a shelter can become unsafe. Vents or fans must be added.
- Insulation Containers heat up in summer and freeze in winter. Insulation helps maintain comfort.
- Building codes, As Local laws may require permits or inspections before you build.
Understanding these challenges will help you plan better and avoid costly mistakes.
Materials and Tools You Will Need
Building a safe container storm shelter requires both basic and heavy-duty materials.
- Shipping container – 20 ft or 40 ft, in good condition.
- Reinforcement materials – Concrete, rebar, and steel beams.
- Waterproofing – Sealants, coatings, and drainage materials.
- Ventilation – Pipes, vents, and air filters.
- Insulation – Spray foam, rigid boards, or other thermal barriers.
- Interior items – Benches, lighting, food storage, and emergency kits.
- Tools – Welding equipment, power tools, shovels, and concrete mixers.
Having the right materials from the start will make the process smoother and safer.
Step-by-Step Guide to Building a Shipping Container Storm Shelter
Turning a shipping container into a storm shelter requires smart modifications.
This project, inspired by a 20-foot container build, demonstrates how to replace the wood floor with reinforced concrete and incorporate features that enhance strength, safety, and comfort.
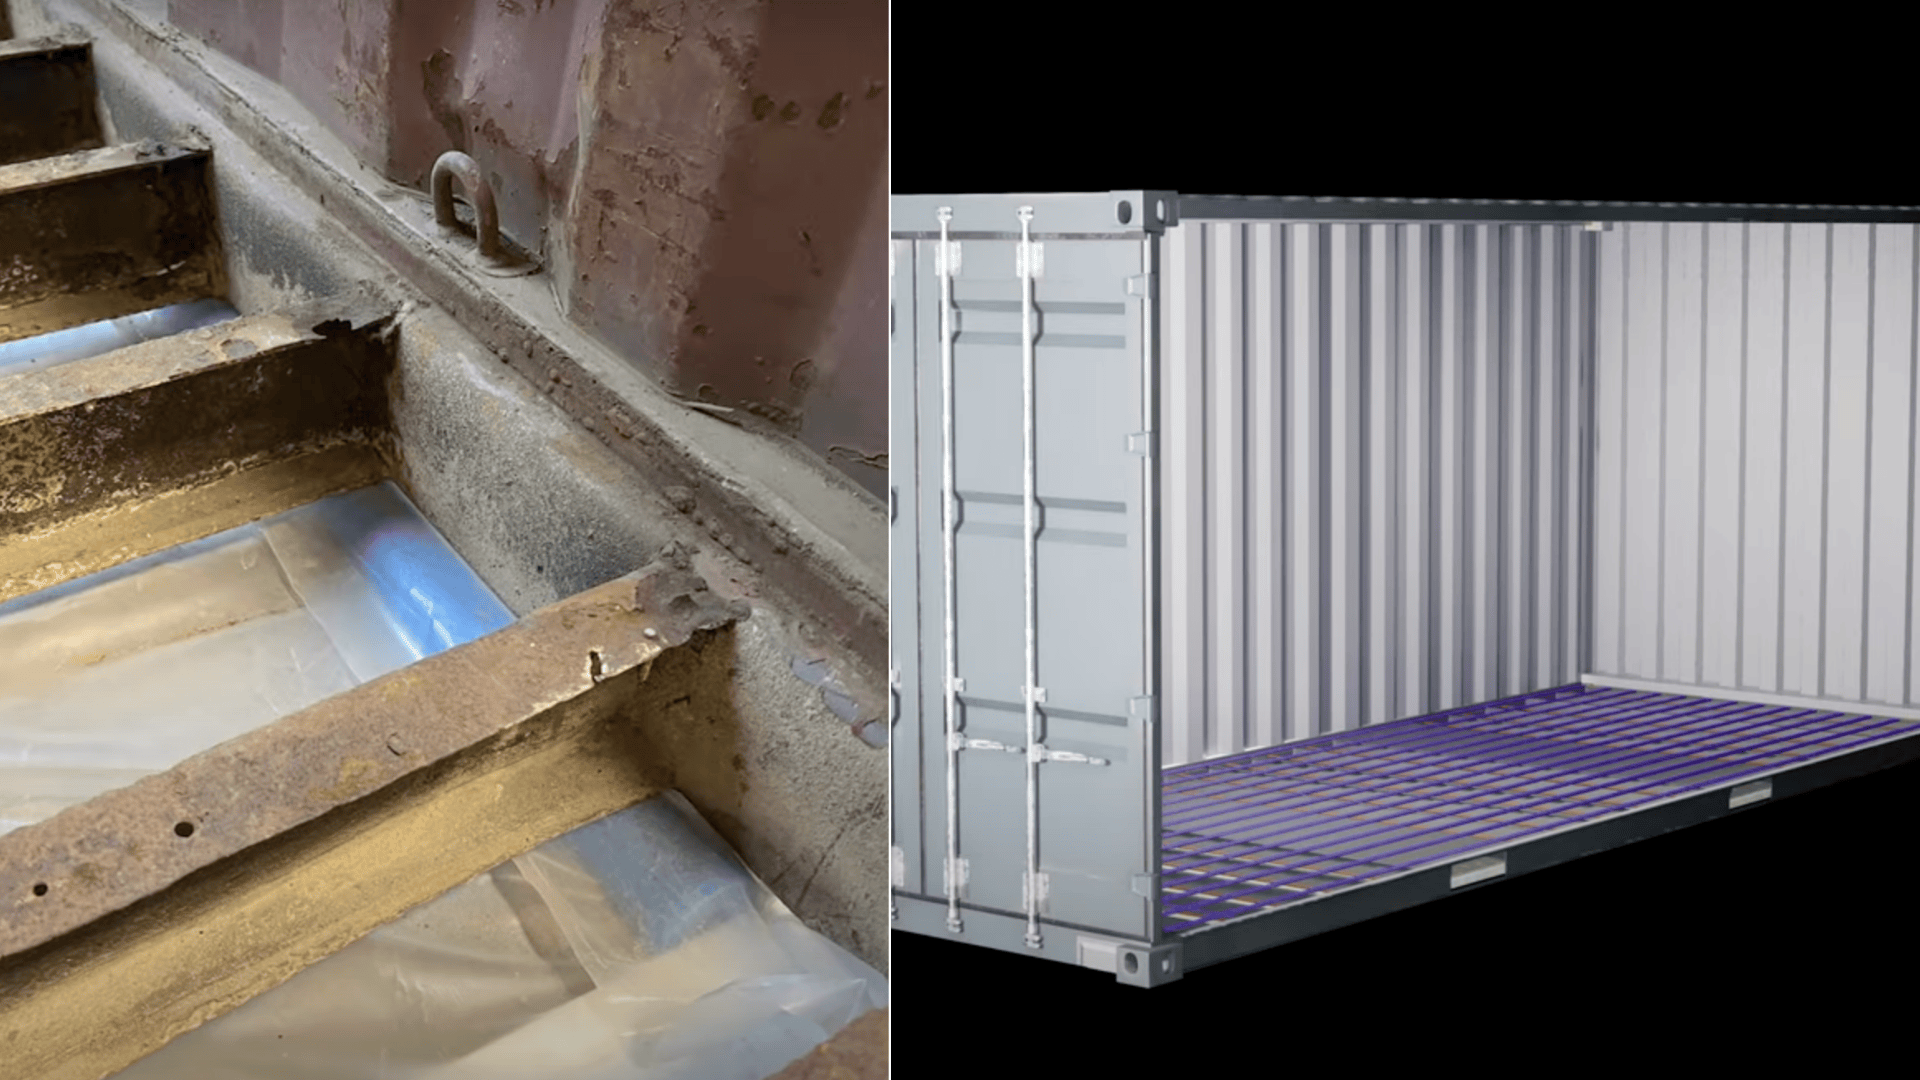
Step 1: Remove the Wood Floor and Prepare the Base
Start by removing the original plywood floor inside the container. This makes room for a stronger concrete slab.
A concrete base lowers the center of gravity, which prevents the container from tipping in high winds. Once the floor is cleared, clean and level the base so it’s ready for pouring.
This step is critical because any uneven spots will weaken the slab later.
Step 2: Set Up Barriers and Drainage Protection
Before pouring concrete, install protective layers around the interior. Use poly sheets to line the base and stop wet concrete from leaking into gaps. Add foam or even simple pool noodles along the edges as barriers.
These materials ensure the concrete stays in place during the pour and don’t allow messy leaks. If the shelter will be exposed to moisture, consider drainage solutions at this stage to keep water away from the base.
Step 3: Add Rebar and Radiant Heating Lines
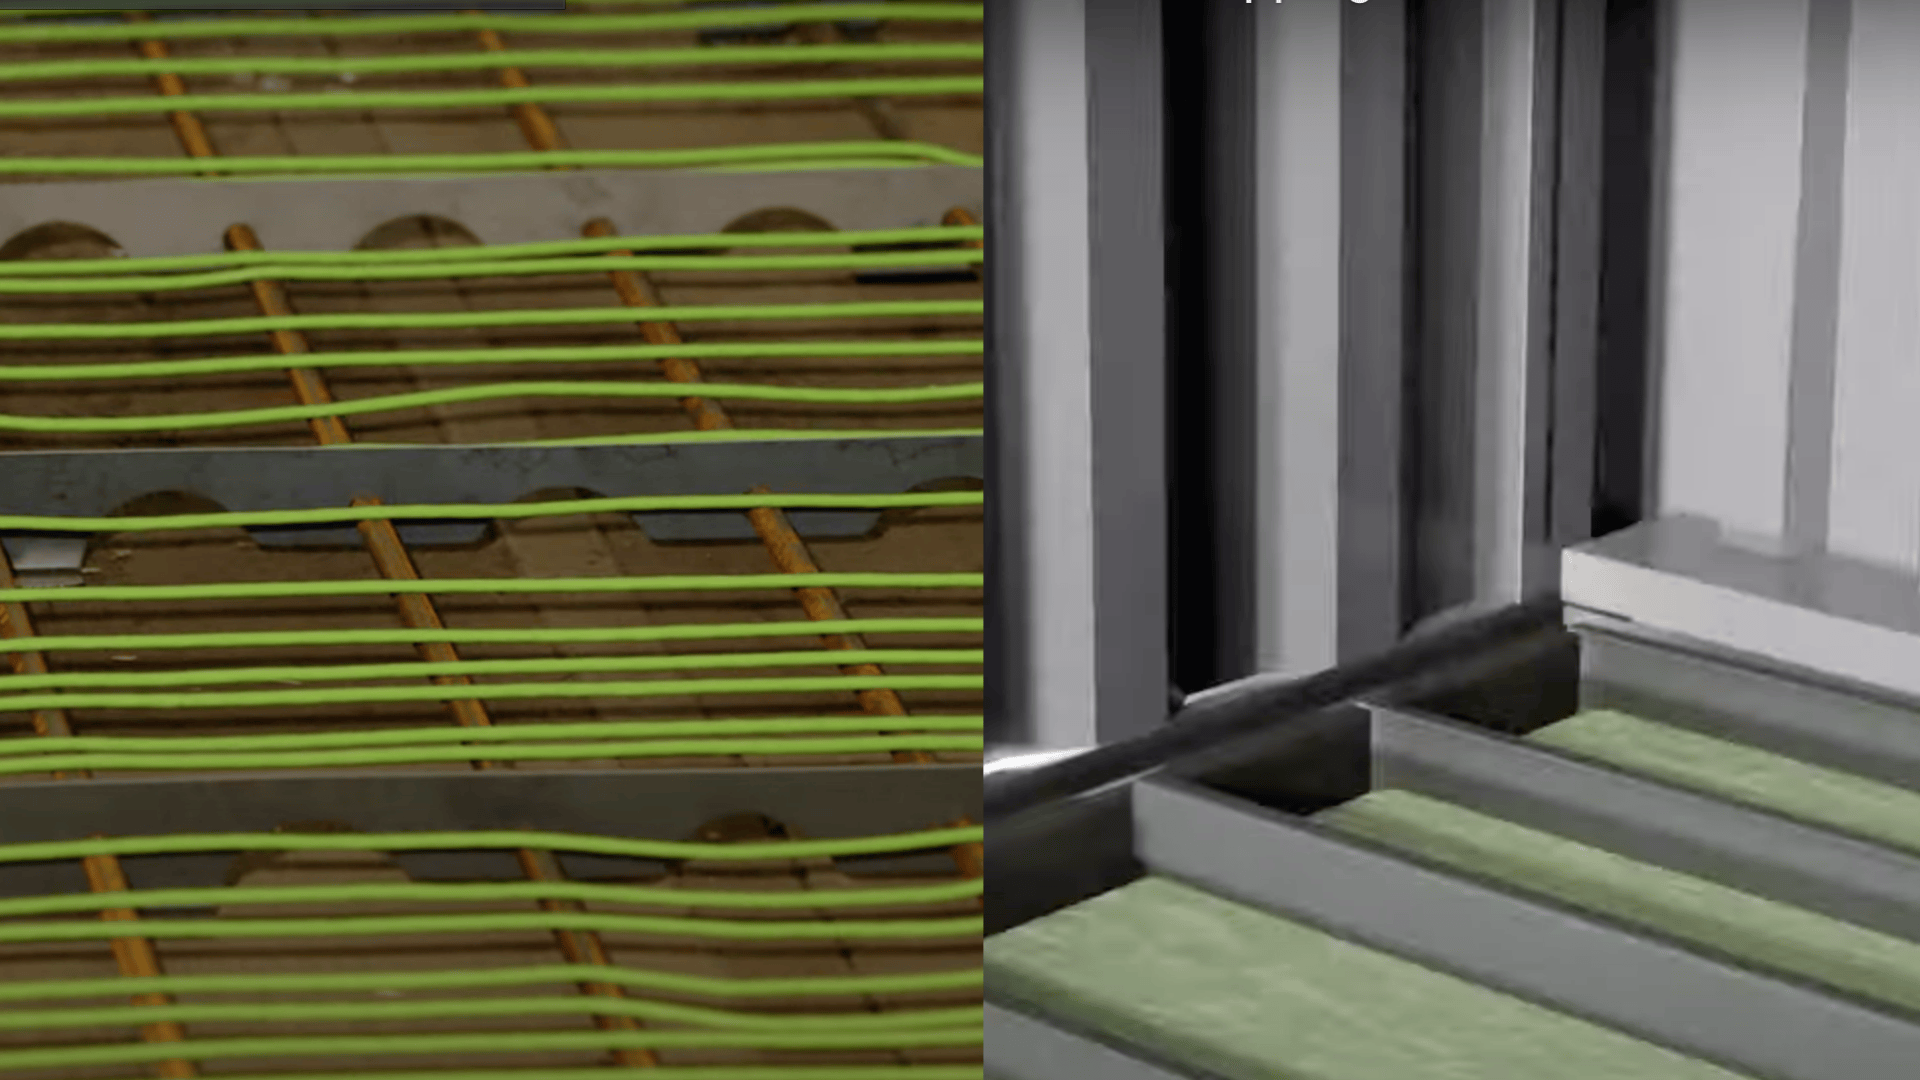
Reinforcement is essential for strength. Lay rebar along the full length of the container and place additional horizontal bars between the crossmembers. This grid prevents cracking and adds structural stability.
At the same time, install radiant heating lines before pouring the concrete. These lines can be electrified, turning the floor into a hidden heat source.
This not only keeps the shelter warm in winter but also saves space since no bulky heaters are needed inside.
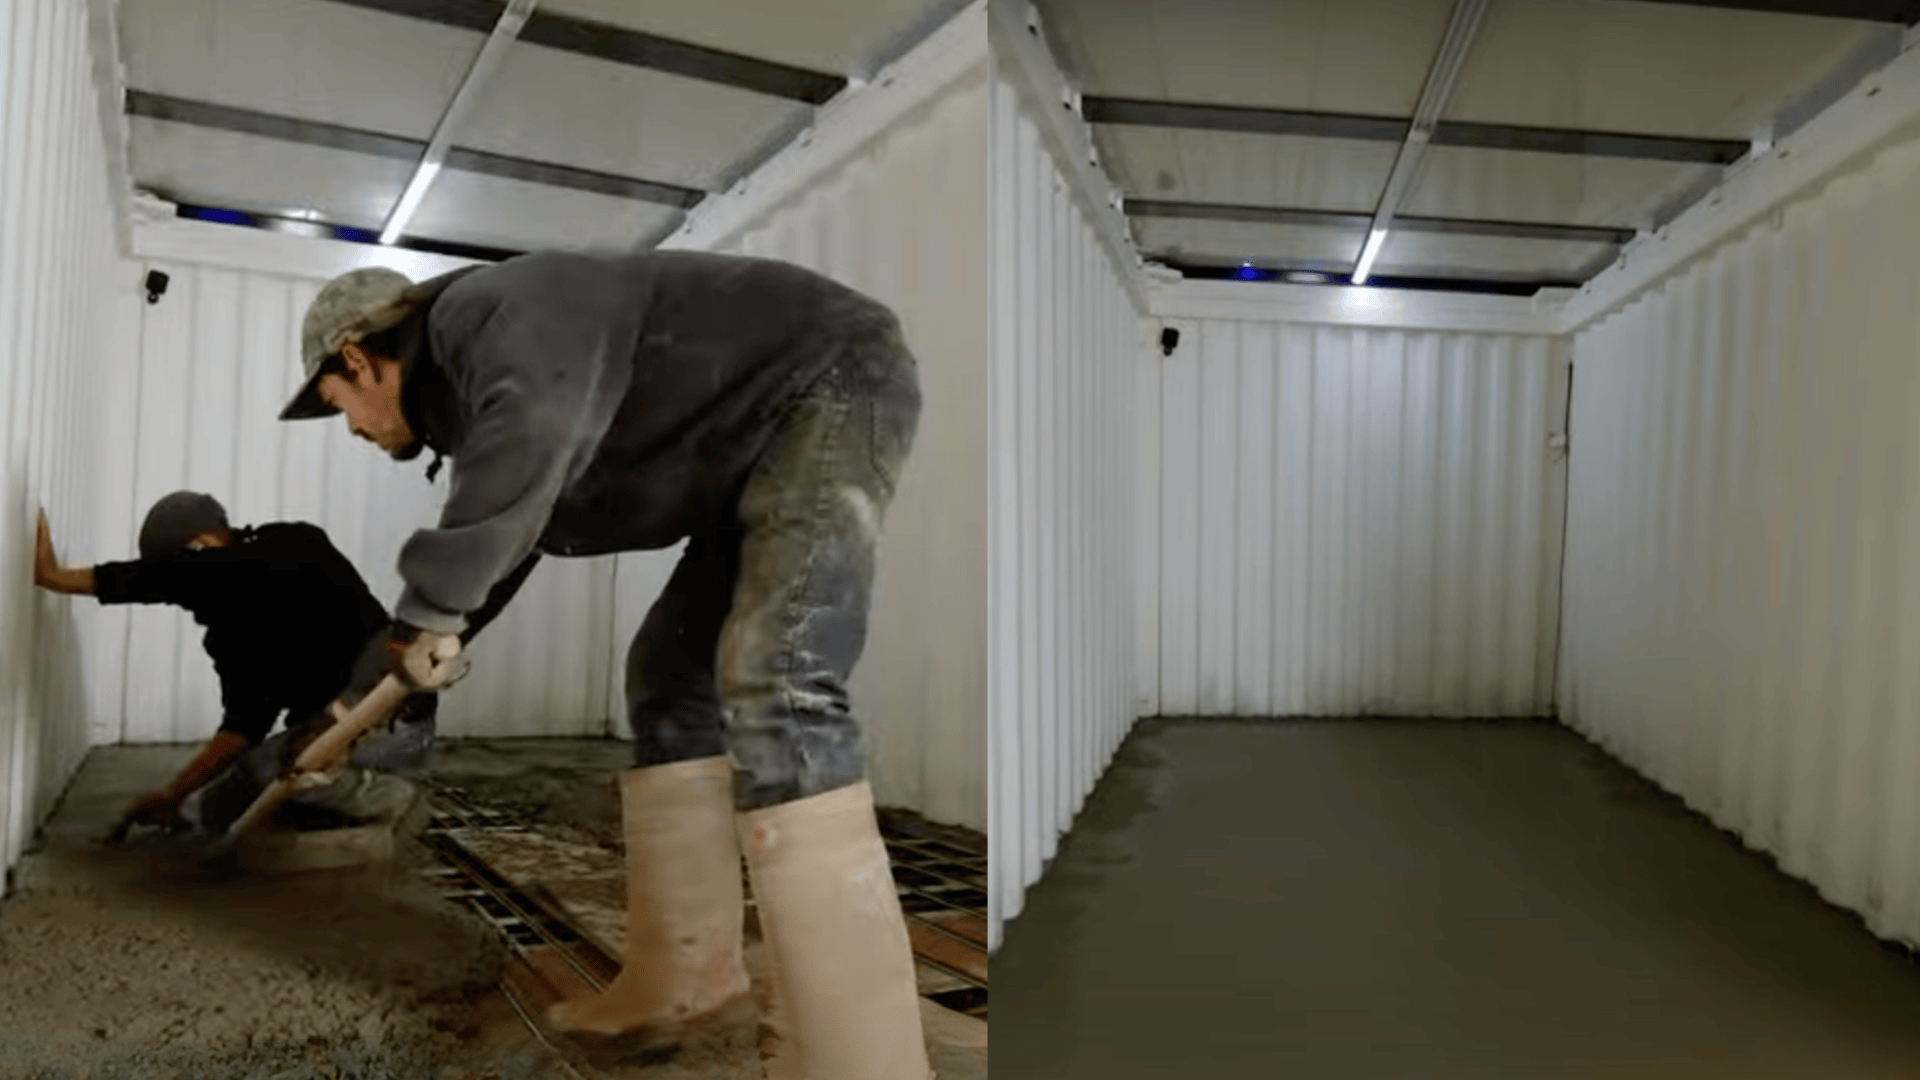
Step 4: Pour and Level the Concrete Slab
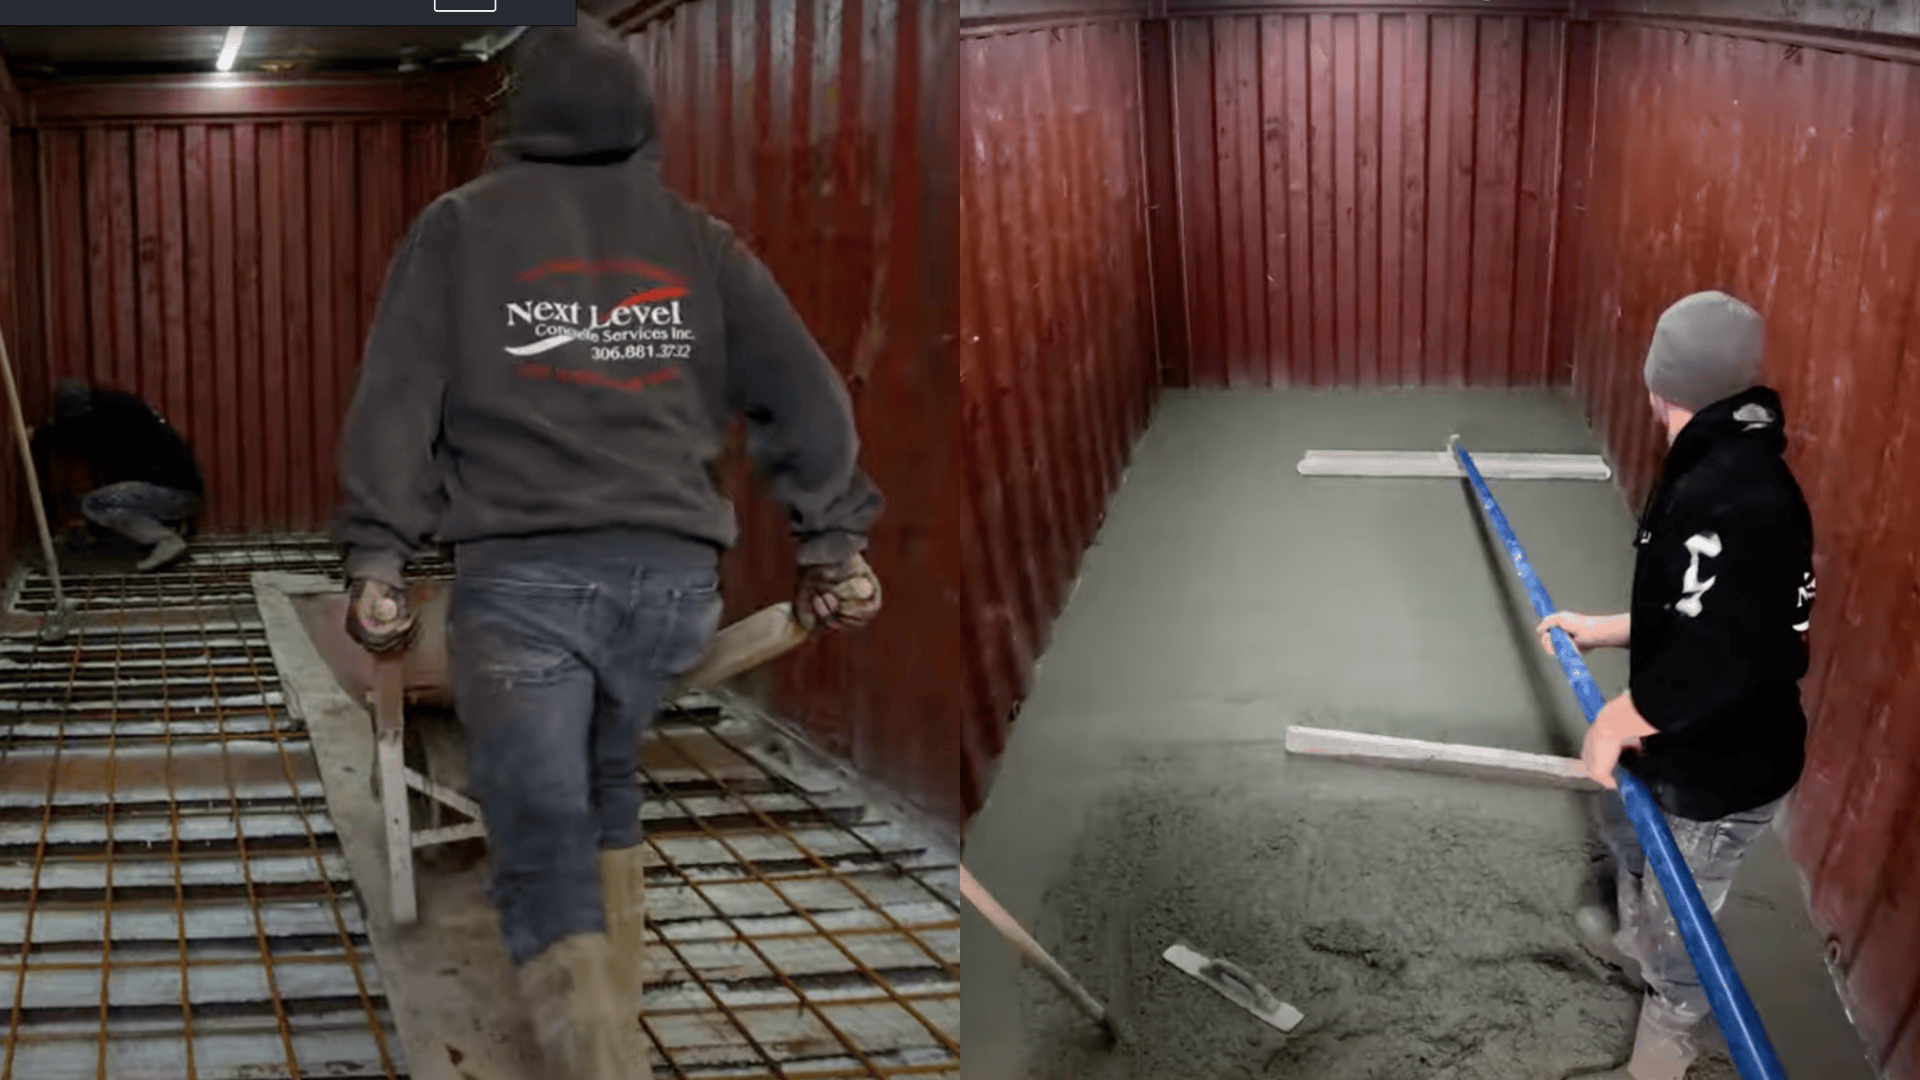
Once the reinforcement and heating lines are in place, pour the concrete into the container. Spread it evenly and fill up to the steel channels at the edges.
Leveling the slab is crucial – it ensures the floor is stable and provides a smooth surface for future use.
In small spaces, such as containers, this is typically done by hand with trowels rather than heavy equipment. The concrete should sit flush with the channels, which helps when joining two containers side by side.
Step 5: Seal and Finish the Surface
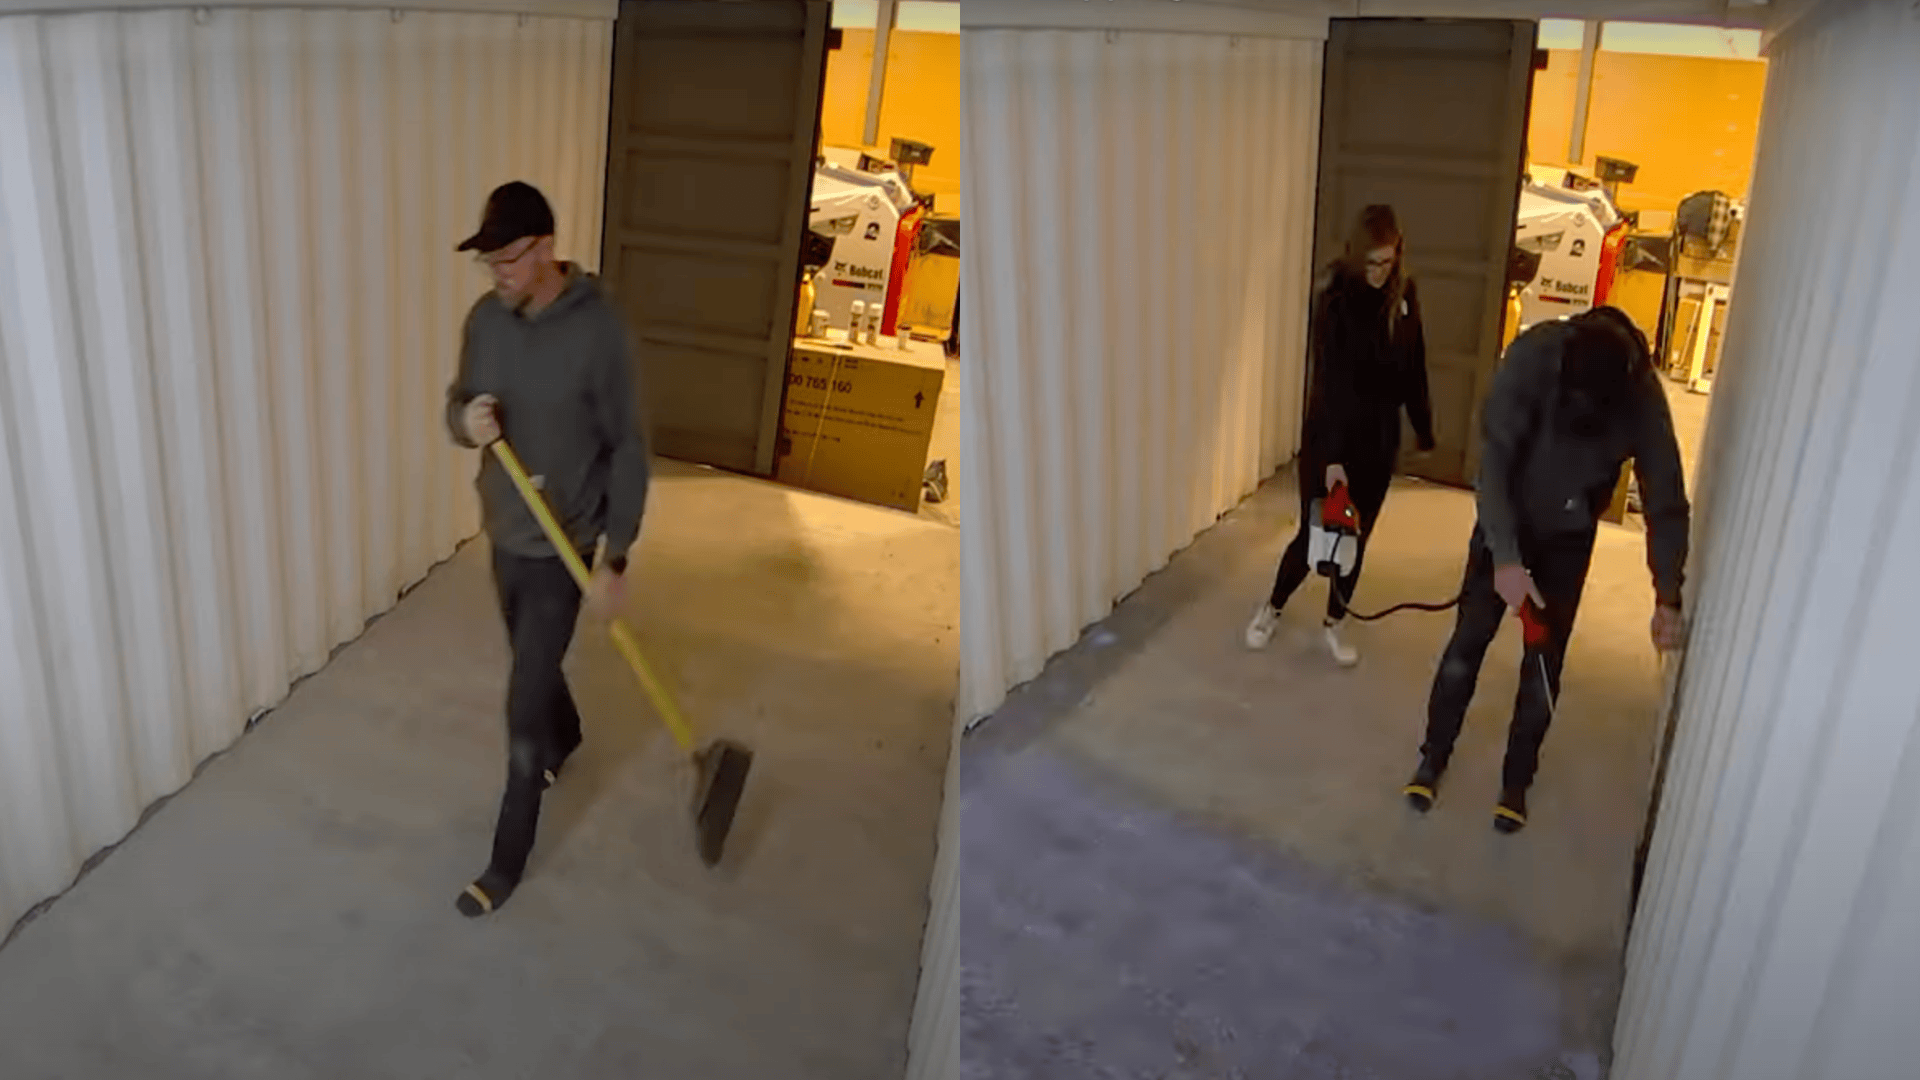
After the concrete is poured and smoothed, apply an acrylic sealer while it is still wet. Sealing protects against dirt, moisture, and stains. It also keeps the slab looking clean and prevents long-term damage.
Depending on your design, you can leave the floor as-is with a burnished look, or you can add tiles later for a polished finish. The sealer ensures any added materials stick better and last longer.
Step 6: Plan for Future Upgrades
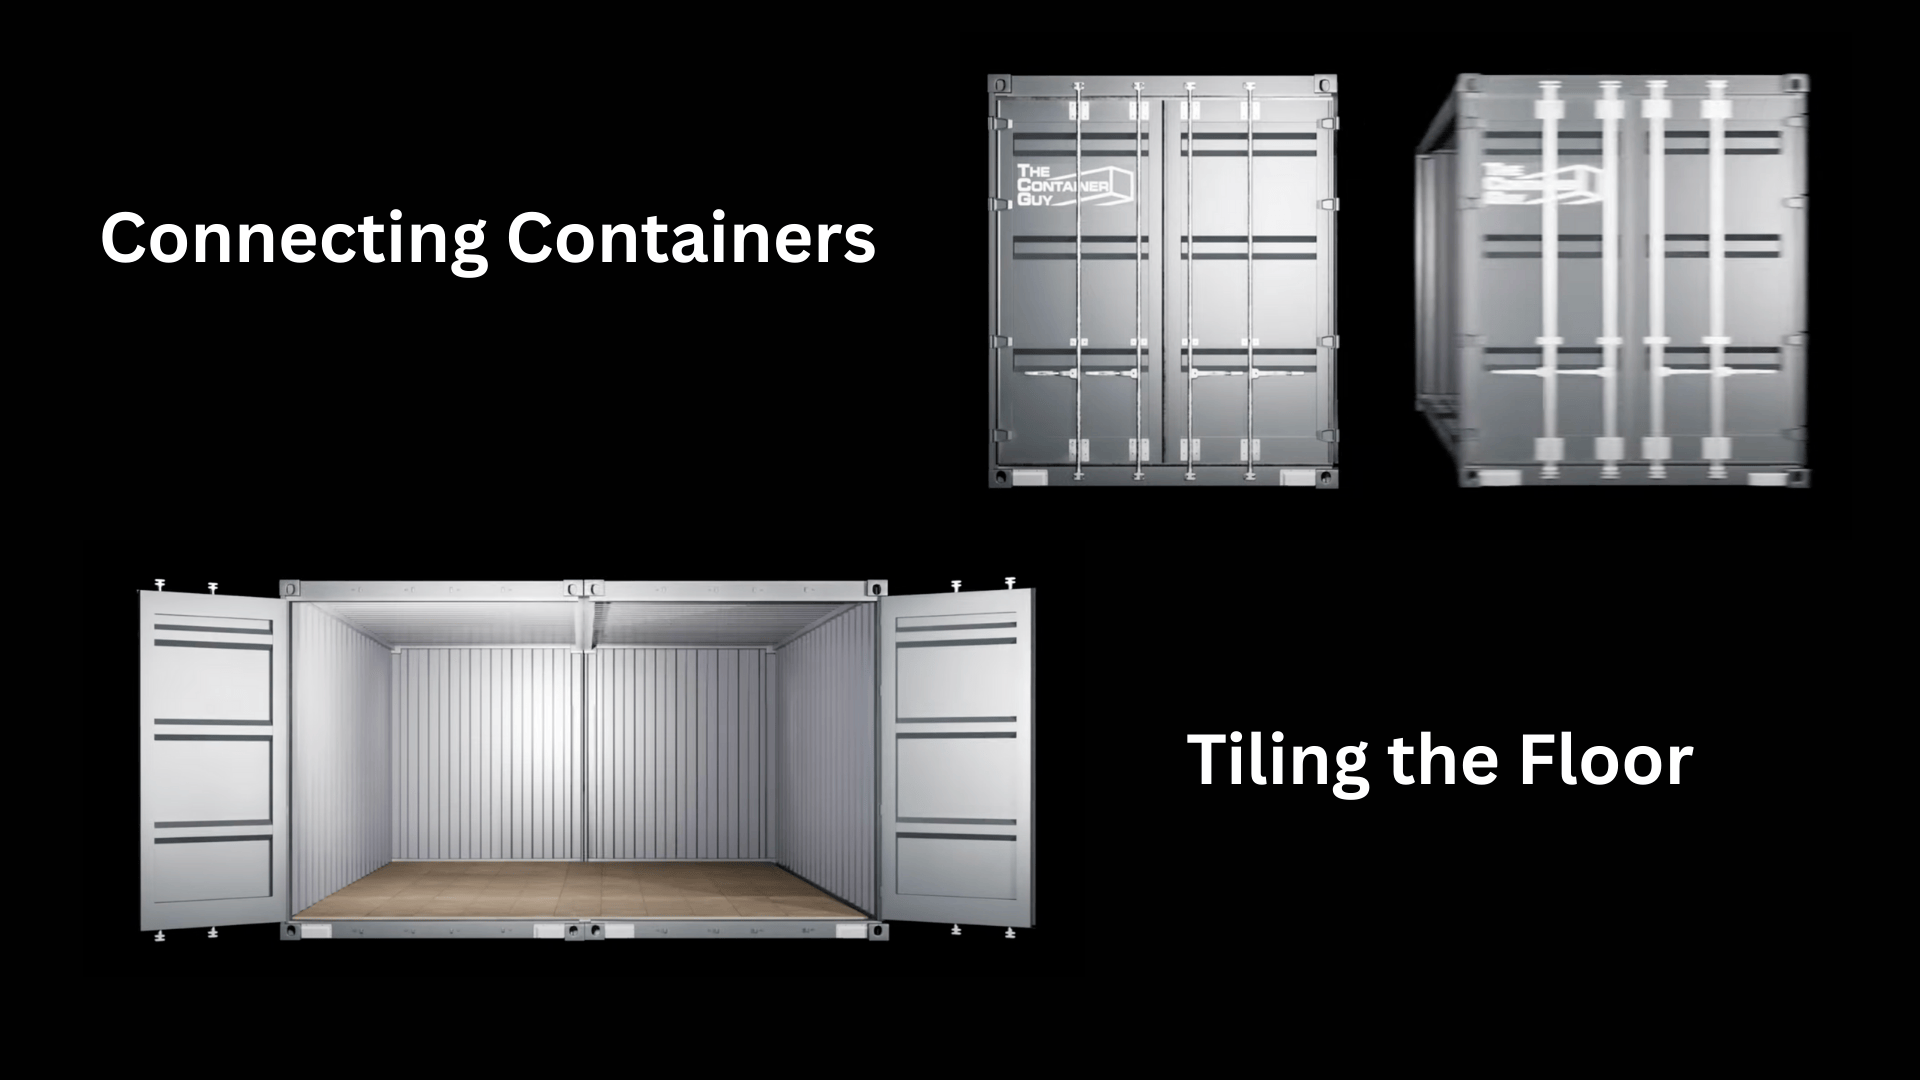
Once the floor is secure, think about future improvements.
Options include adding hydronic heating systems (using water instead of electricity), tiling the floor for easy cleaning, or connecting multiple containers with a continuous floor.
Planning ahead helps avoid tearing things apart later and makes the shelter more adaptable for long-term use.
For a detailed walkthrough, check out @The Container Guy’s full video guide here.
Cost Breakdown of a Shipping Container Storm Shelter
Building a shipping container storm shelter requires more than just buying a container. Replacing the wood floor with a reinforced concrete slab and radiant heating system adds both stability and comfort.
| Item | Purpose | Estimated Cost (USD) |
|---|---|---|
| 20 ft shipping container | Base structure for shelter | $2,500 – $5,000 |
| Concrete slab (materials + pour) | Adds weight, stability, and thermal mass | $3,000 – $6,000 |
| Radiant heating lines | Provides hidden floor heating for comfort | $800 – $1,200 |
| Rebar reinforcement | Strengthens the slab and prevents cracking | $500 – $1,000 |
| Poly sheets + foam (barriers) | Prevents leaks and supports pour | $200 – $400 |
| Acrylic concrete sealer | Protects the slab from dirt and moisture | $150 – $300 |
| Labor (if not DIY) | Professional concrete and finishing work | $4,000 – $7,000 |
Total Estimated Cost: $11,000 – $20,000
This range covers the basic modifications shown in the video. Additional features, such as tiling, insulation, ventilation systems, or hydronic heating, would increase the total cost.
Above-Ground vs. Underground Storm Shelter
You can build a storage container storm shelter either above ground or underground, with its own strengths and weaknesses.
An above-ground shelter is easier to build, costs less, and can be set up quickly. However, it doesn’t offer the same level of protection against flying debris or powerful winds.
An underground shelter provides maximum safety during severe storms and tornadoes because it is shielded by the earth. The downside is that it requires heavy reinforcement, waterproofing, and more labor, which increases costs and time.
The choice between the two depends on the budget, the layout of your property, and the level of protection you want for your loved ones.
Pros & Cons of Using Shipping Containers as Storm Shelters
This quick comparison illustrates why containers can be effective, as well as why planning is crucial.
|
Pros |
Cons |
|
Affordable and easy to find |
Not designed for underground pressure |
|
Strong steel frame |
Rusts without proper protection |
|
Portable and reusable |
Requires major reinforcement |
|
Can be customized |
May not meet all local codes |
Safety and Legal Considerations
Building a storm shelter is not just about materials – it must meet safety standards.
- Check local codes – Some areas require permits.
- Follow FEMA guidelines – FEMA provides standards for the design of safe shelters.
- Plan escape routes – Always have a backup exit.
- Test systems – Ventilation and waterproofing should be tested before use.
Failing to follow legal and safety protocols could put your family at risk.
Conclusion
A shipping container storm shelter can be a safe, affordable option if built correctly. With reinforcement, waterproofing, and ventilation, these containers can provide protection to families during severe weather.
While not perfect, they are flexible, available, and can be adapted for both above-ground and underground use.
By planning carefully and adhering to safety standards, you can transform a simple storage container into a reliable storm shelter.
If you decide to build one, focus on using high-quality materials, proper installation, and prioritizing safety at all times.
A well-prepared storage container storm shelter could make all the difference when the next storm arrives.